Interactive Onboarding with drift init
drift init is an interactive terminal UI (TUI) that takes you from zero configuration to a running contract test in a single session. It guides you through authentication, OpenAPI file selection, endpoint and parameter configuration, plugin selection, and server setup — then runs the verification and writes the resulting test file to disk.
Use drift init when you are setting up Drift for the first time on a project and want a guided path to your first passing test.
drift init produces one executing test case, not a complete test suite. After completing init, use your IDE or an AI agent skill to expand coverage across the rest of your API.
What you will learn
By the end of this tutorial, you will have:
- Authenticated with PactFlow
- Selected an OpenAPI definition and an endpoint to test
- Run a successful contract verification
- A saved test case file you can re-run at any time with
drift verify
Prerequisites
Before you begin, you will need:
- Drift installed — see Installation
- A PactFlow account with Drift enabled — sign up at pactflow.io
- Your PactFlow API token and workspace URL
- An OpenAPI definition file in your project directory
Launch drift init
Run the following command in your project root:
drift init
The Welcome screen appears.
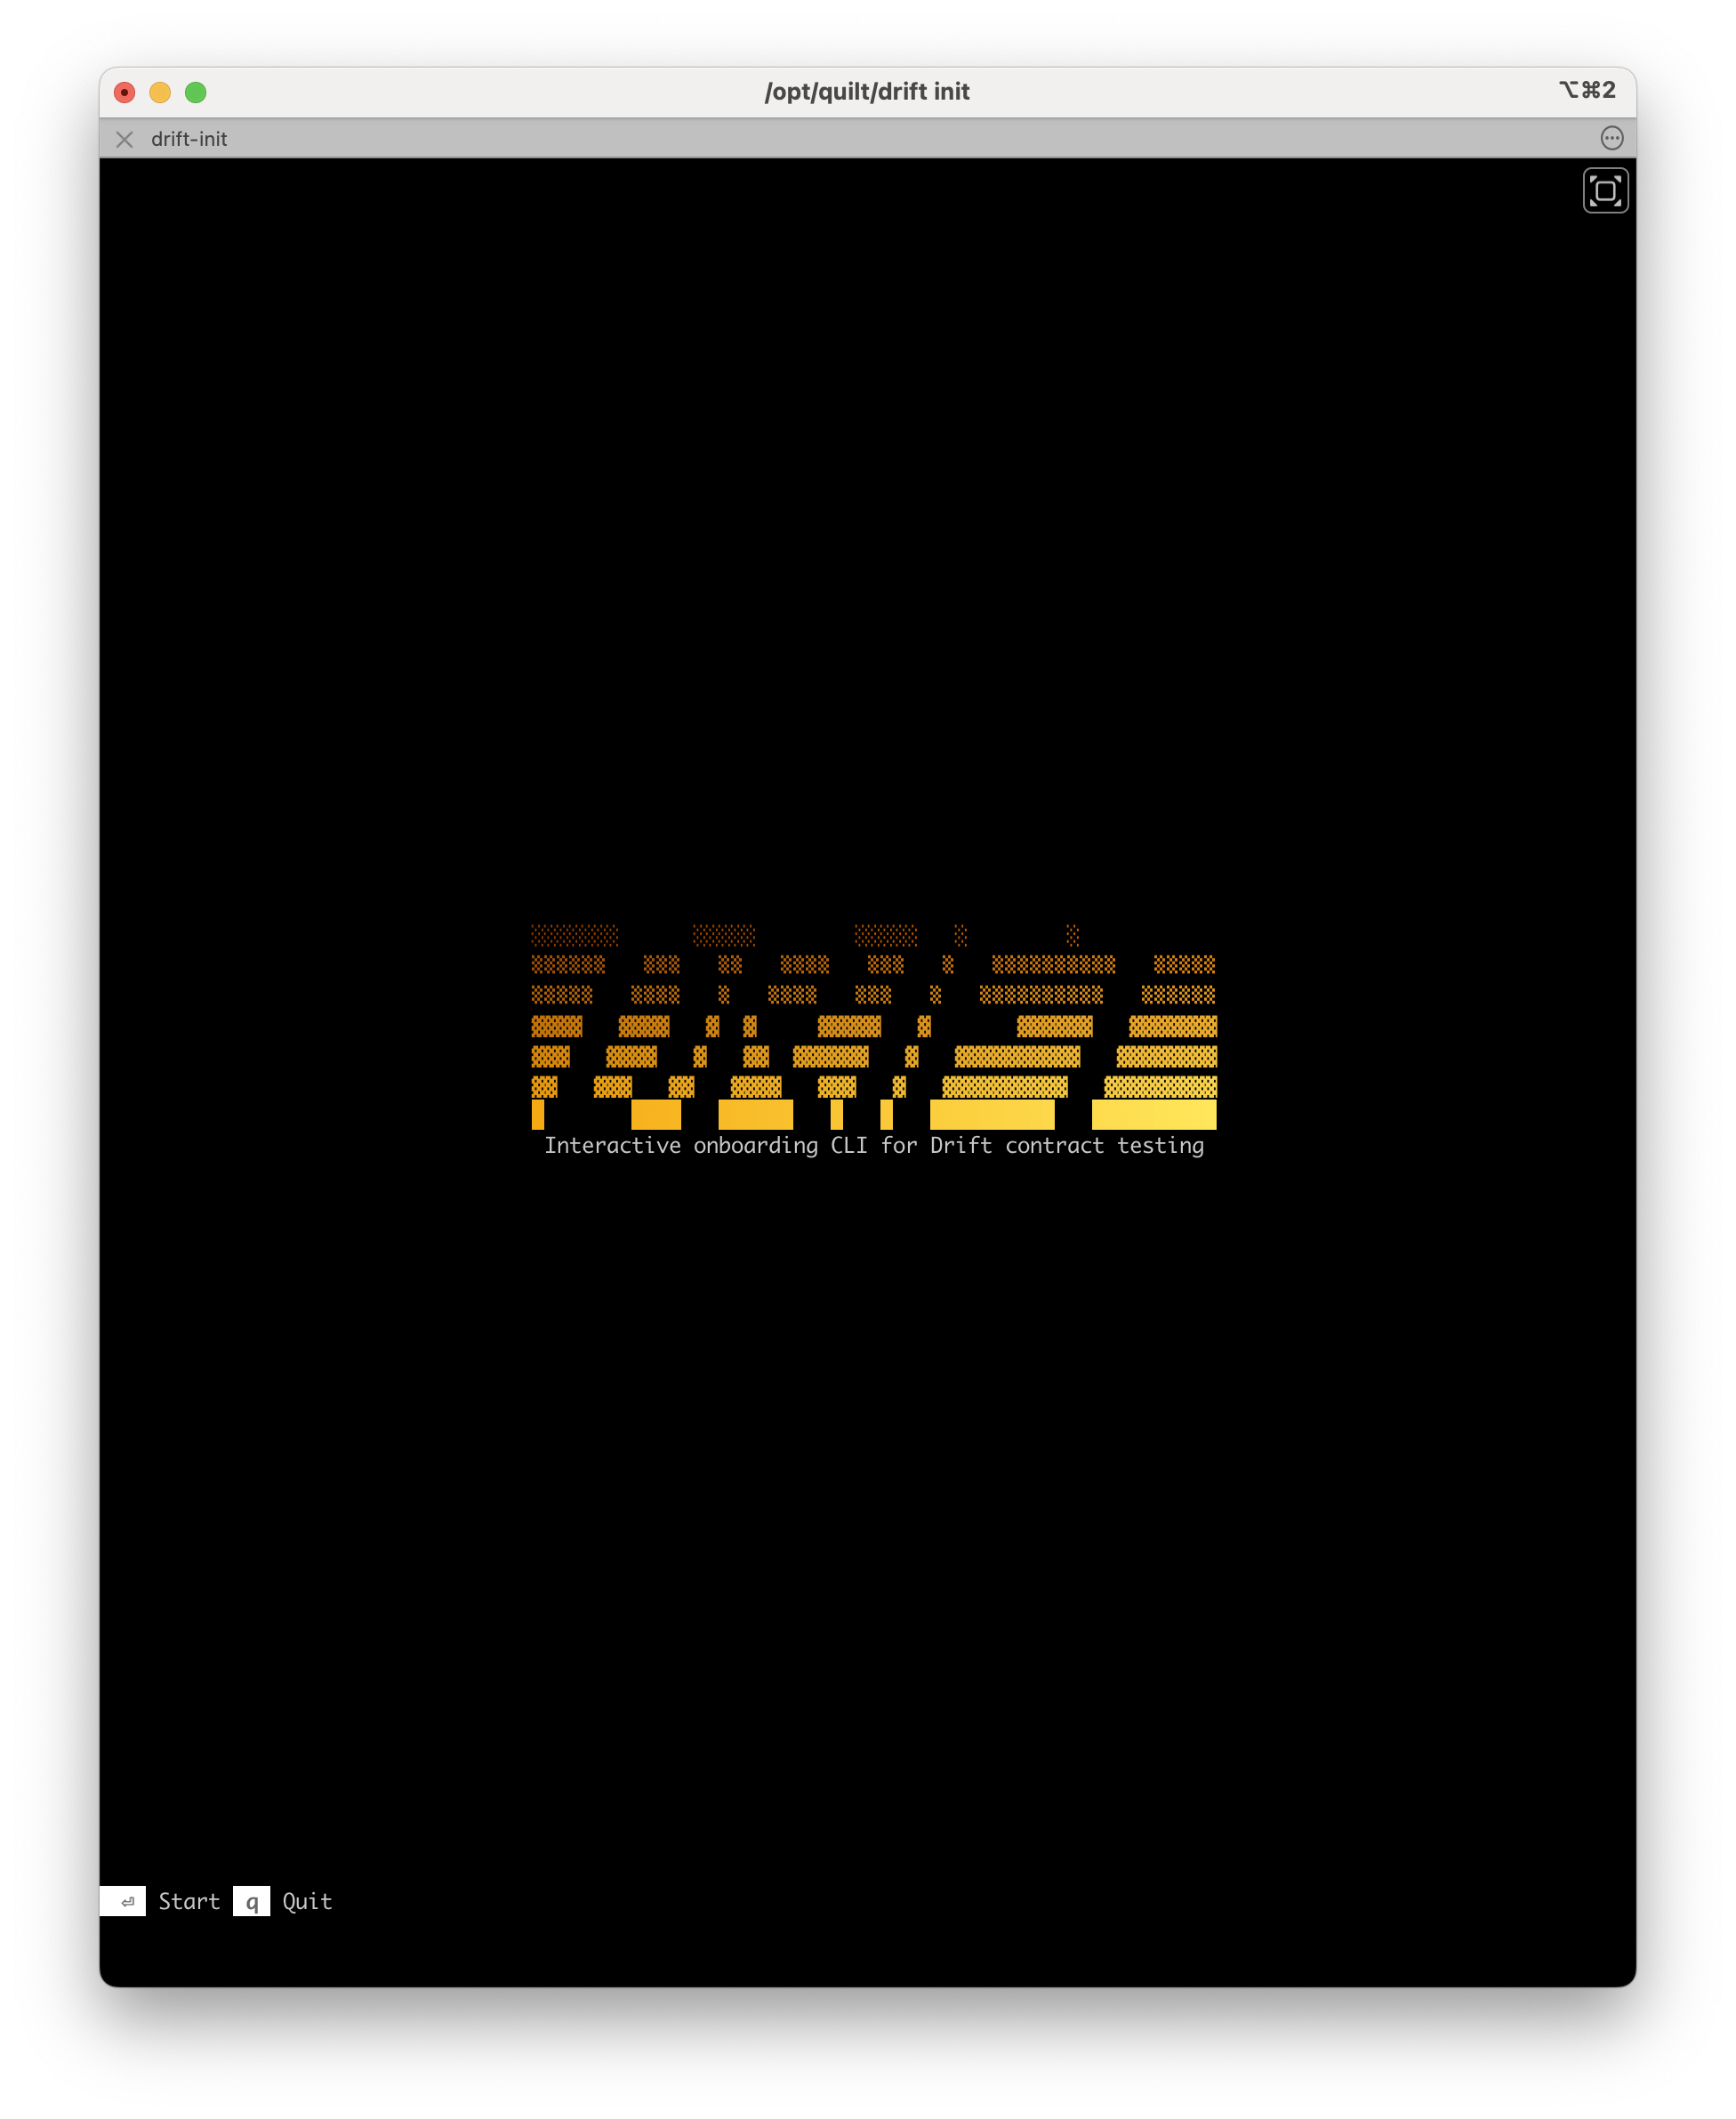
Press enter to start the onboarding flow, or q to quit.
Step 1: Auth
Drift checks your shell environment for PactFlow credentials:
PACT_BROKER_BASE_URLPACT_BROKER_TOKEN
If both variables are set, Drift reads them automatically and pre-populates the fields.
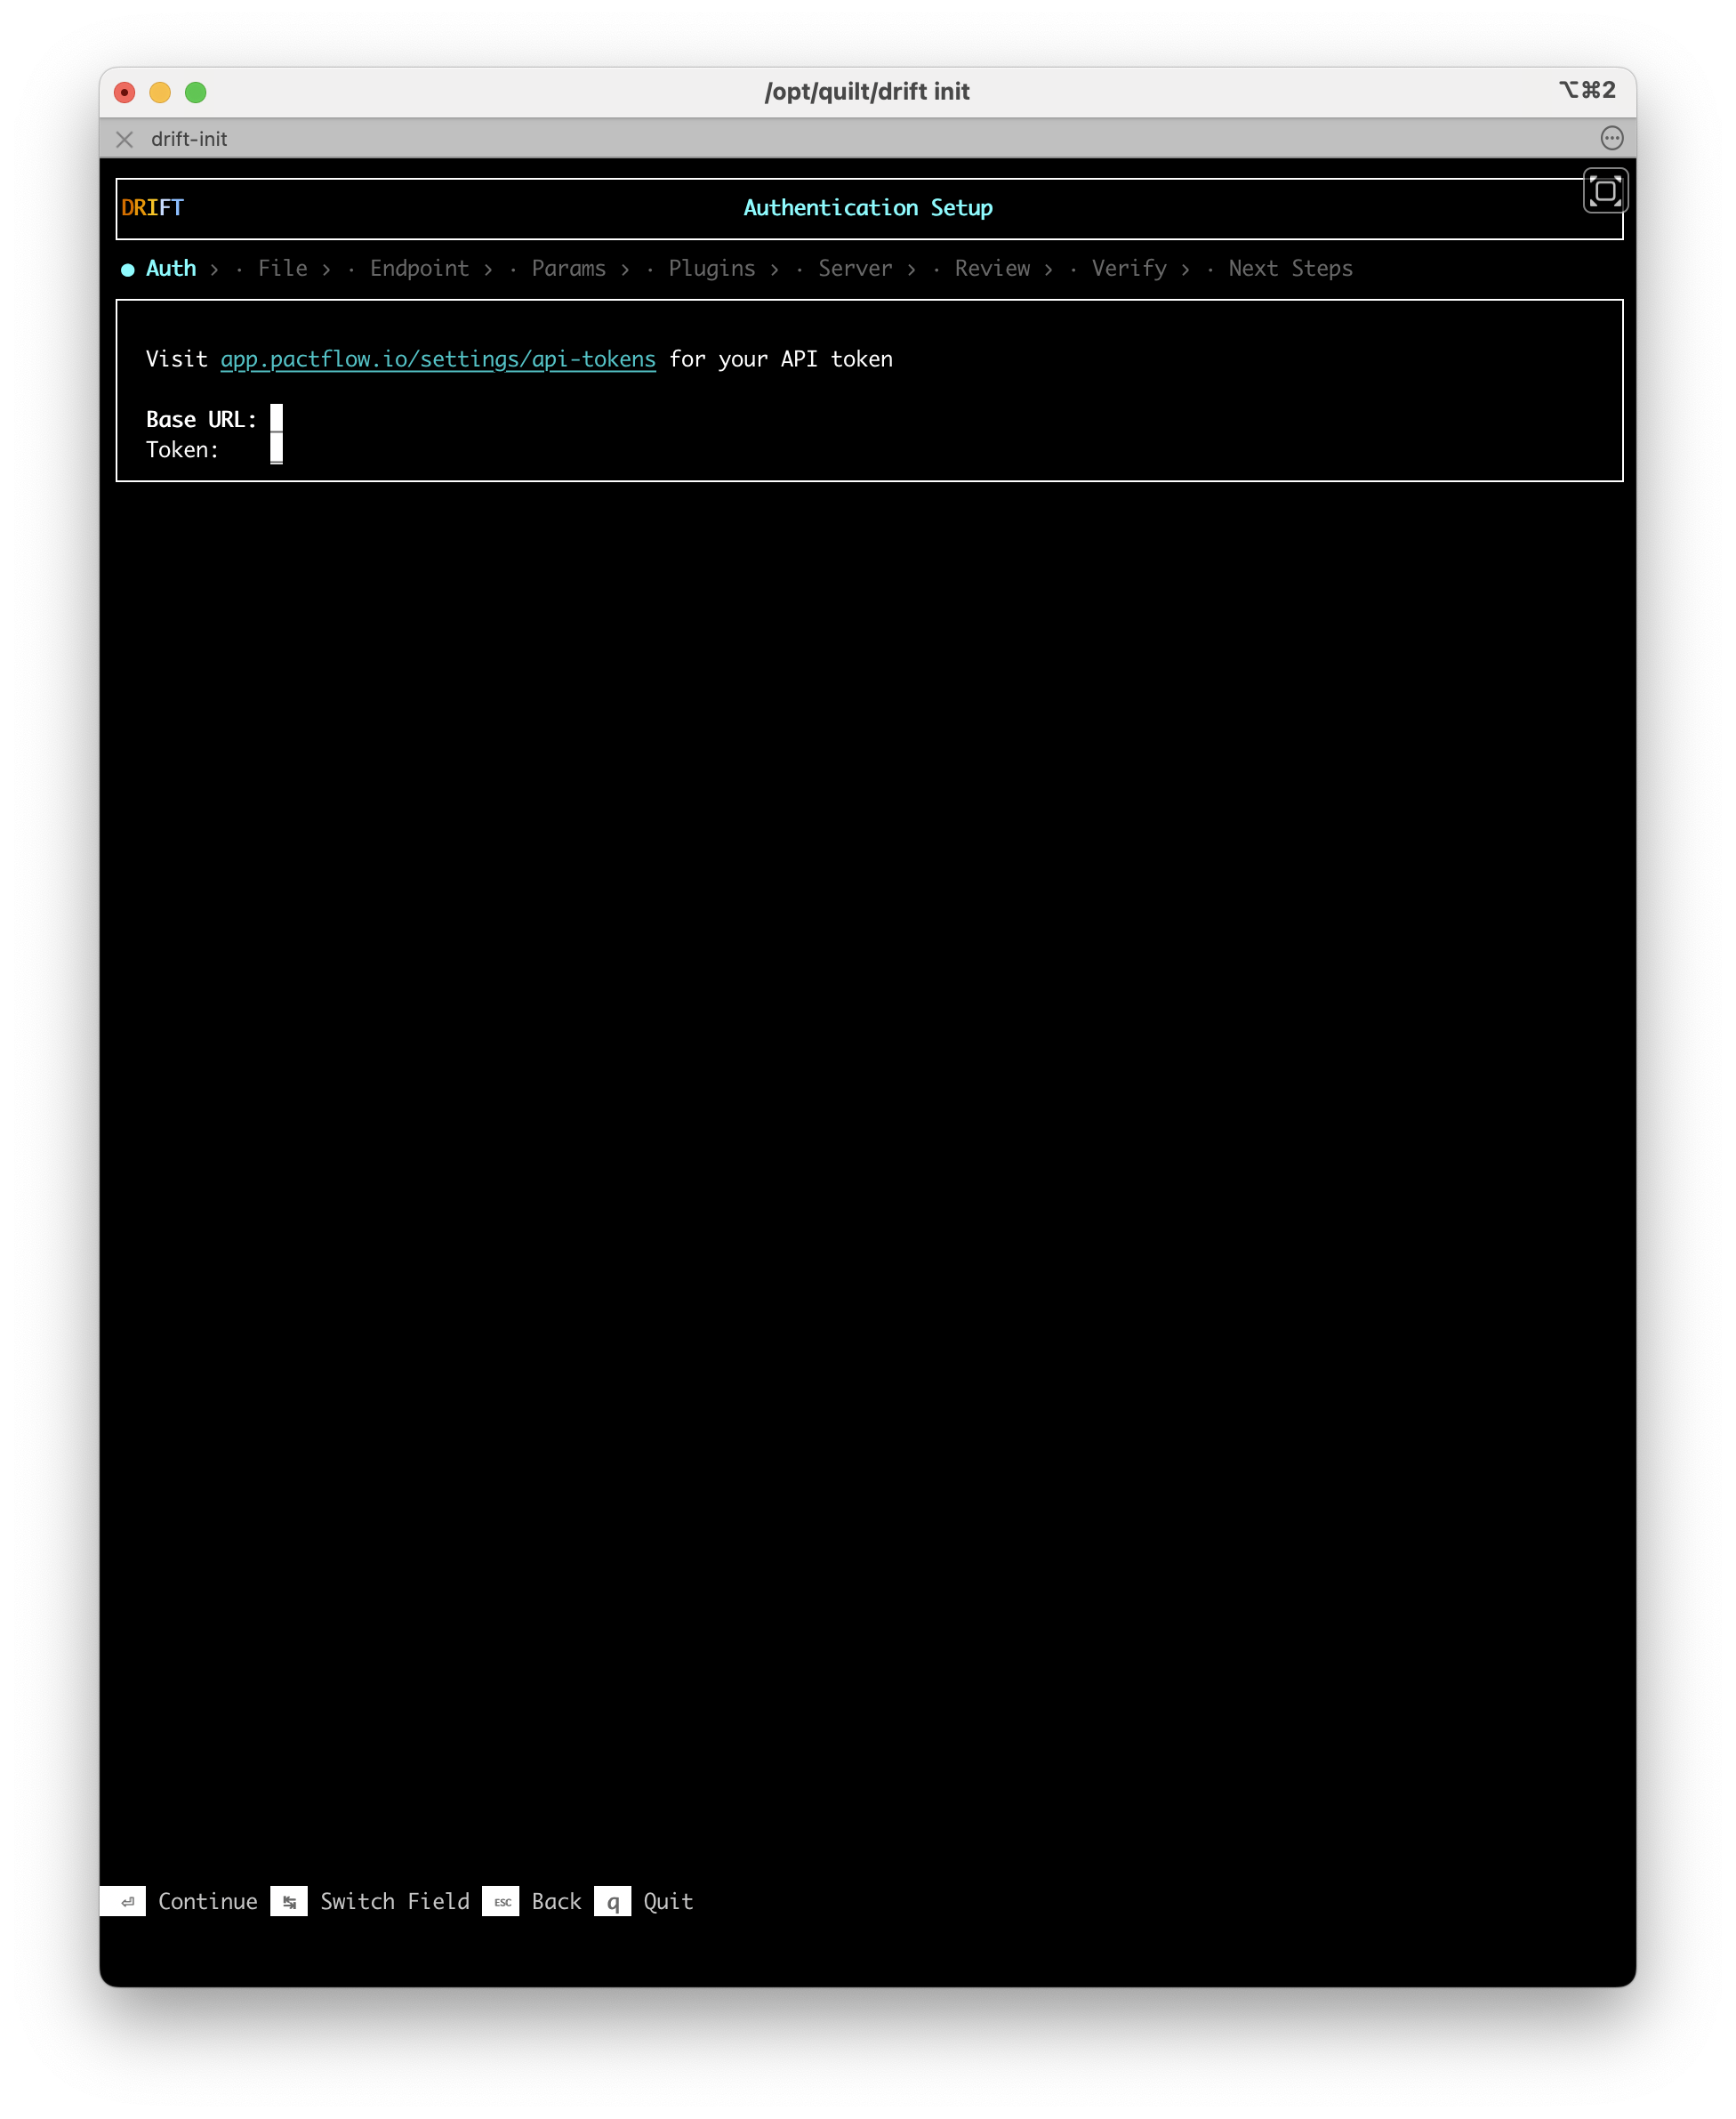
If the variables are not set, enter your workspace URL and API token manually. Use Tab to switch between fields.
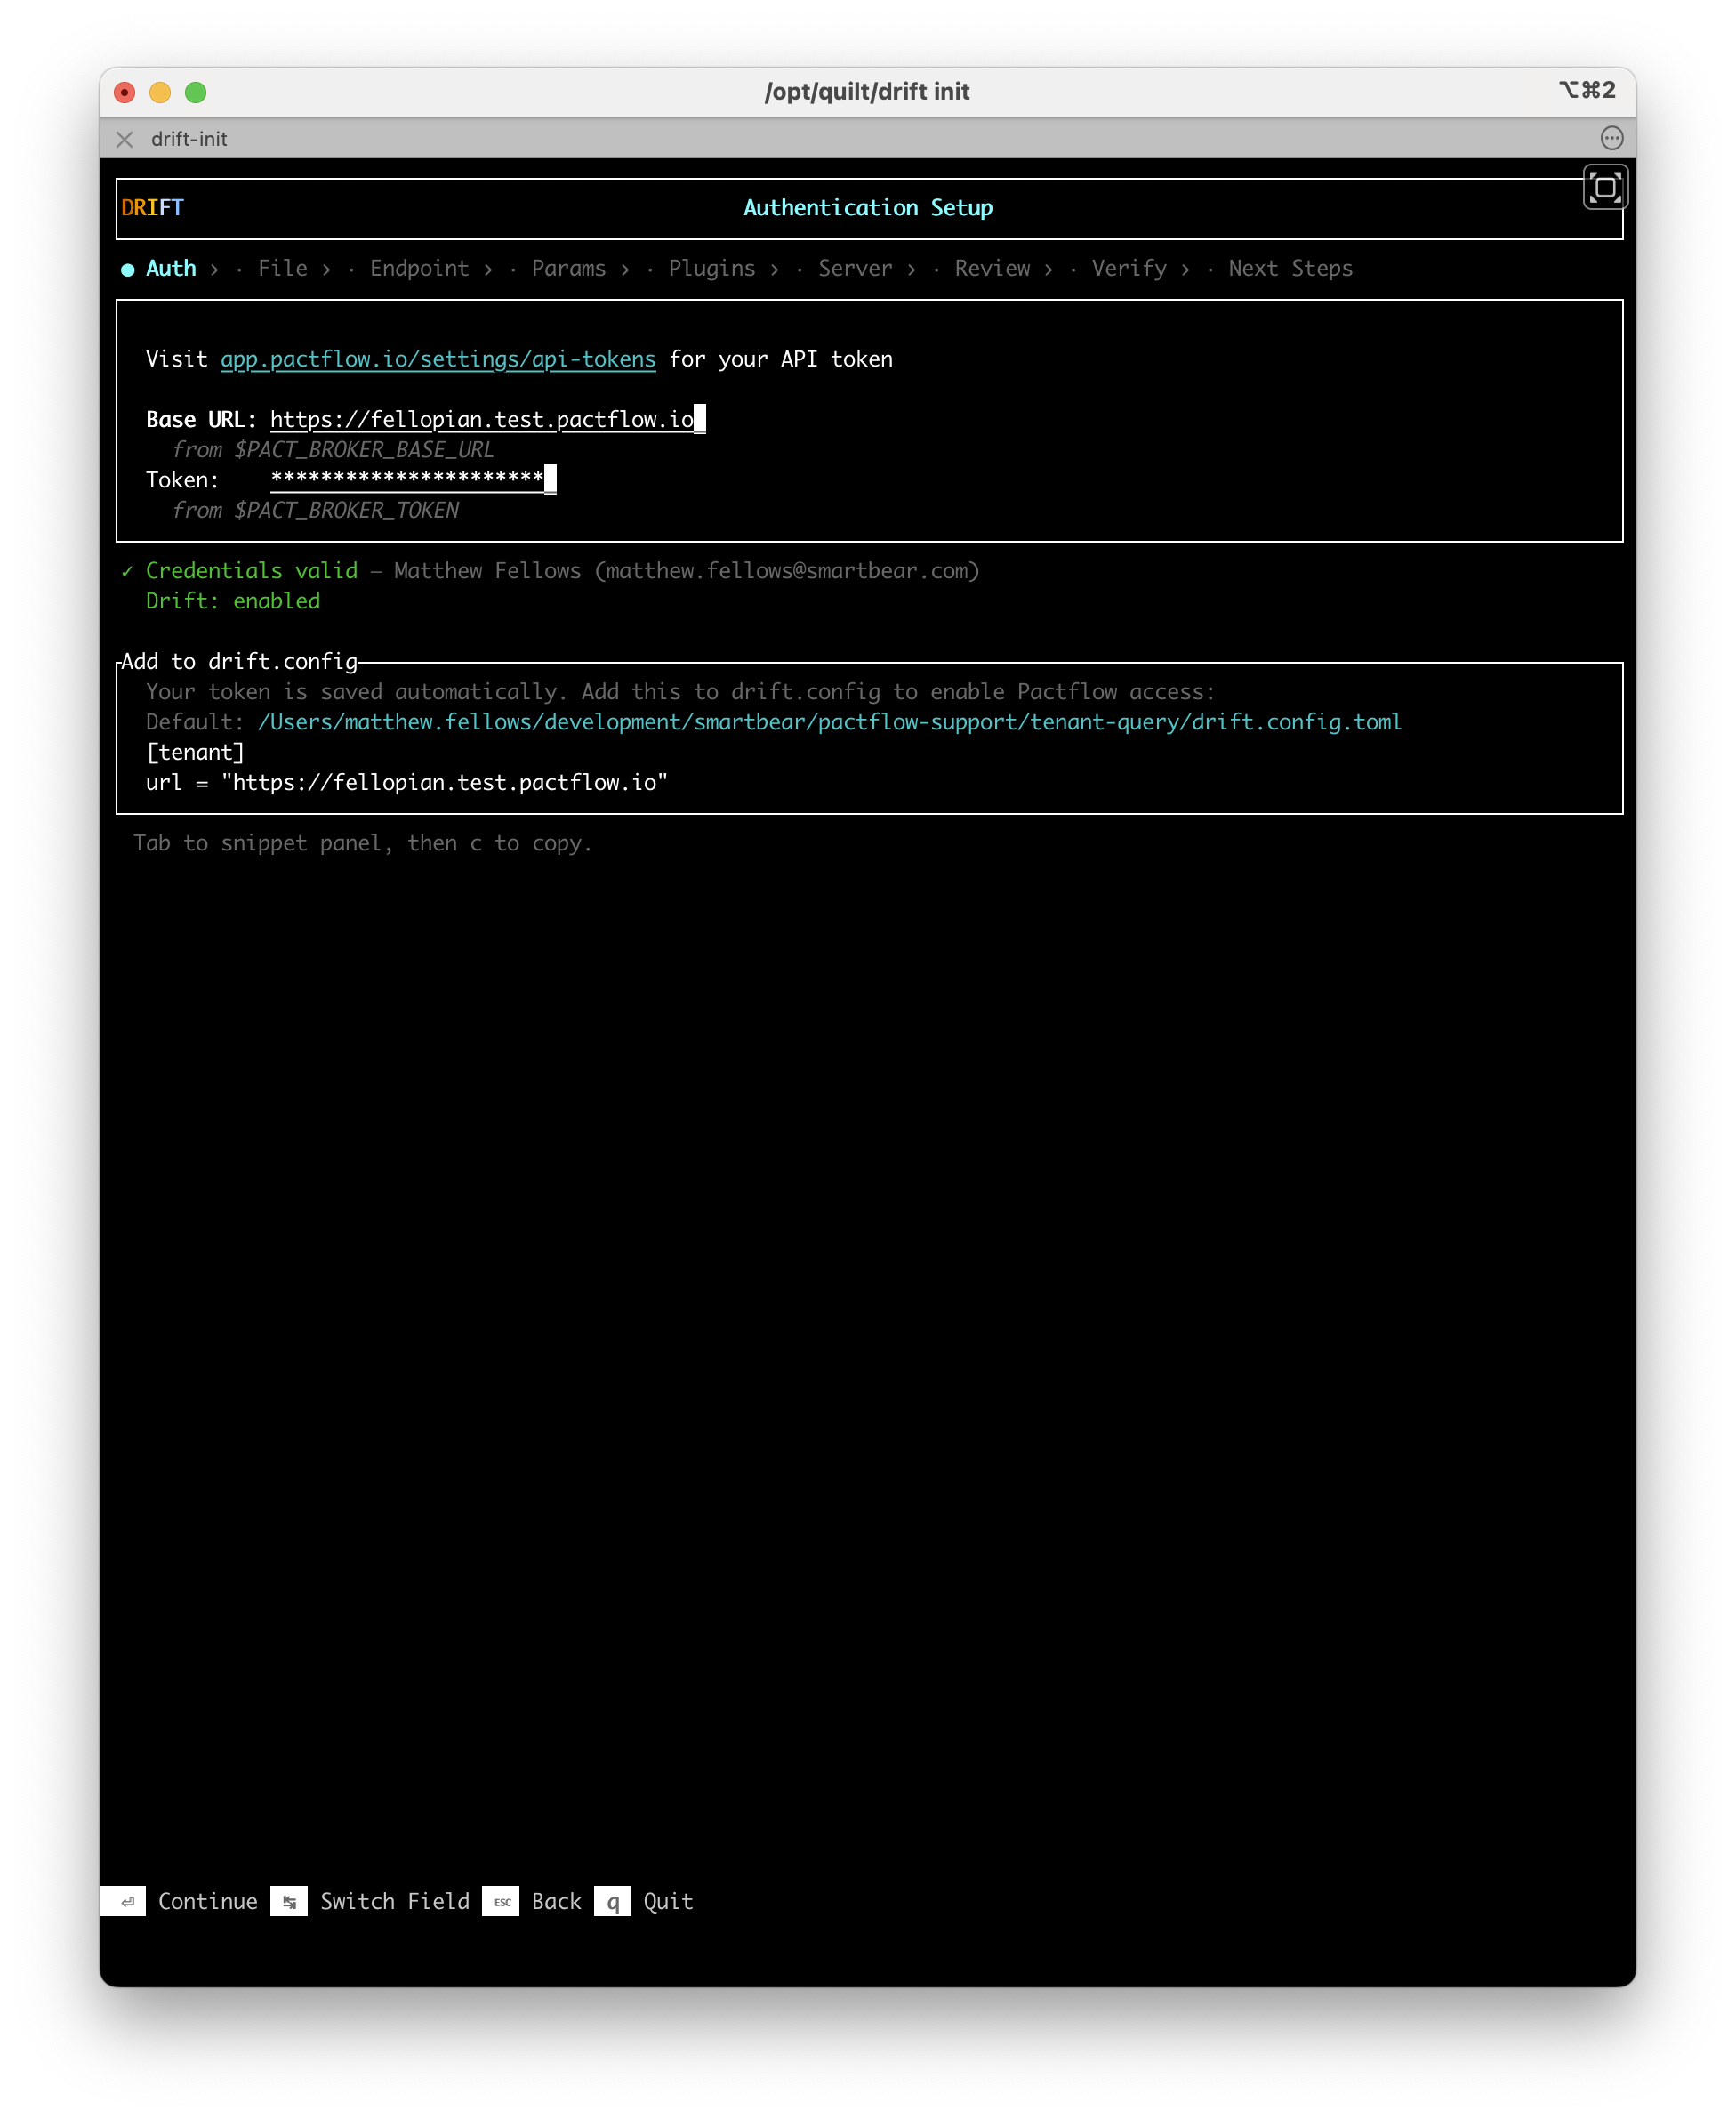
Once credentials are entered, Drift validates them against PactFlow and confirms your plan has Drift enabled.
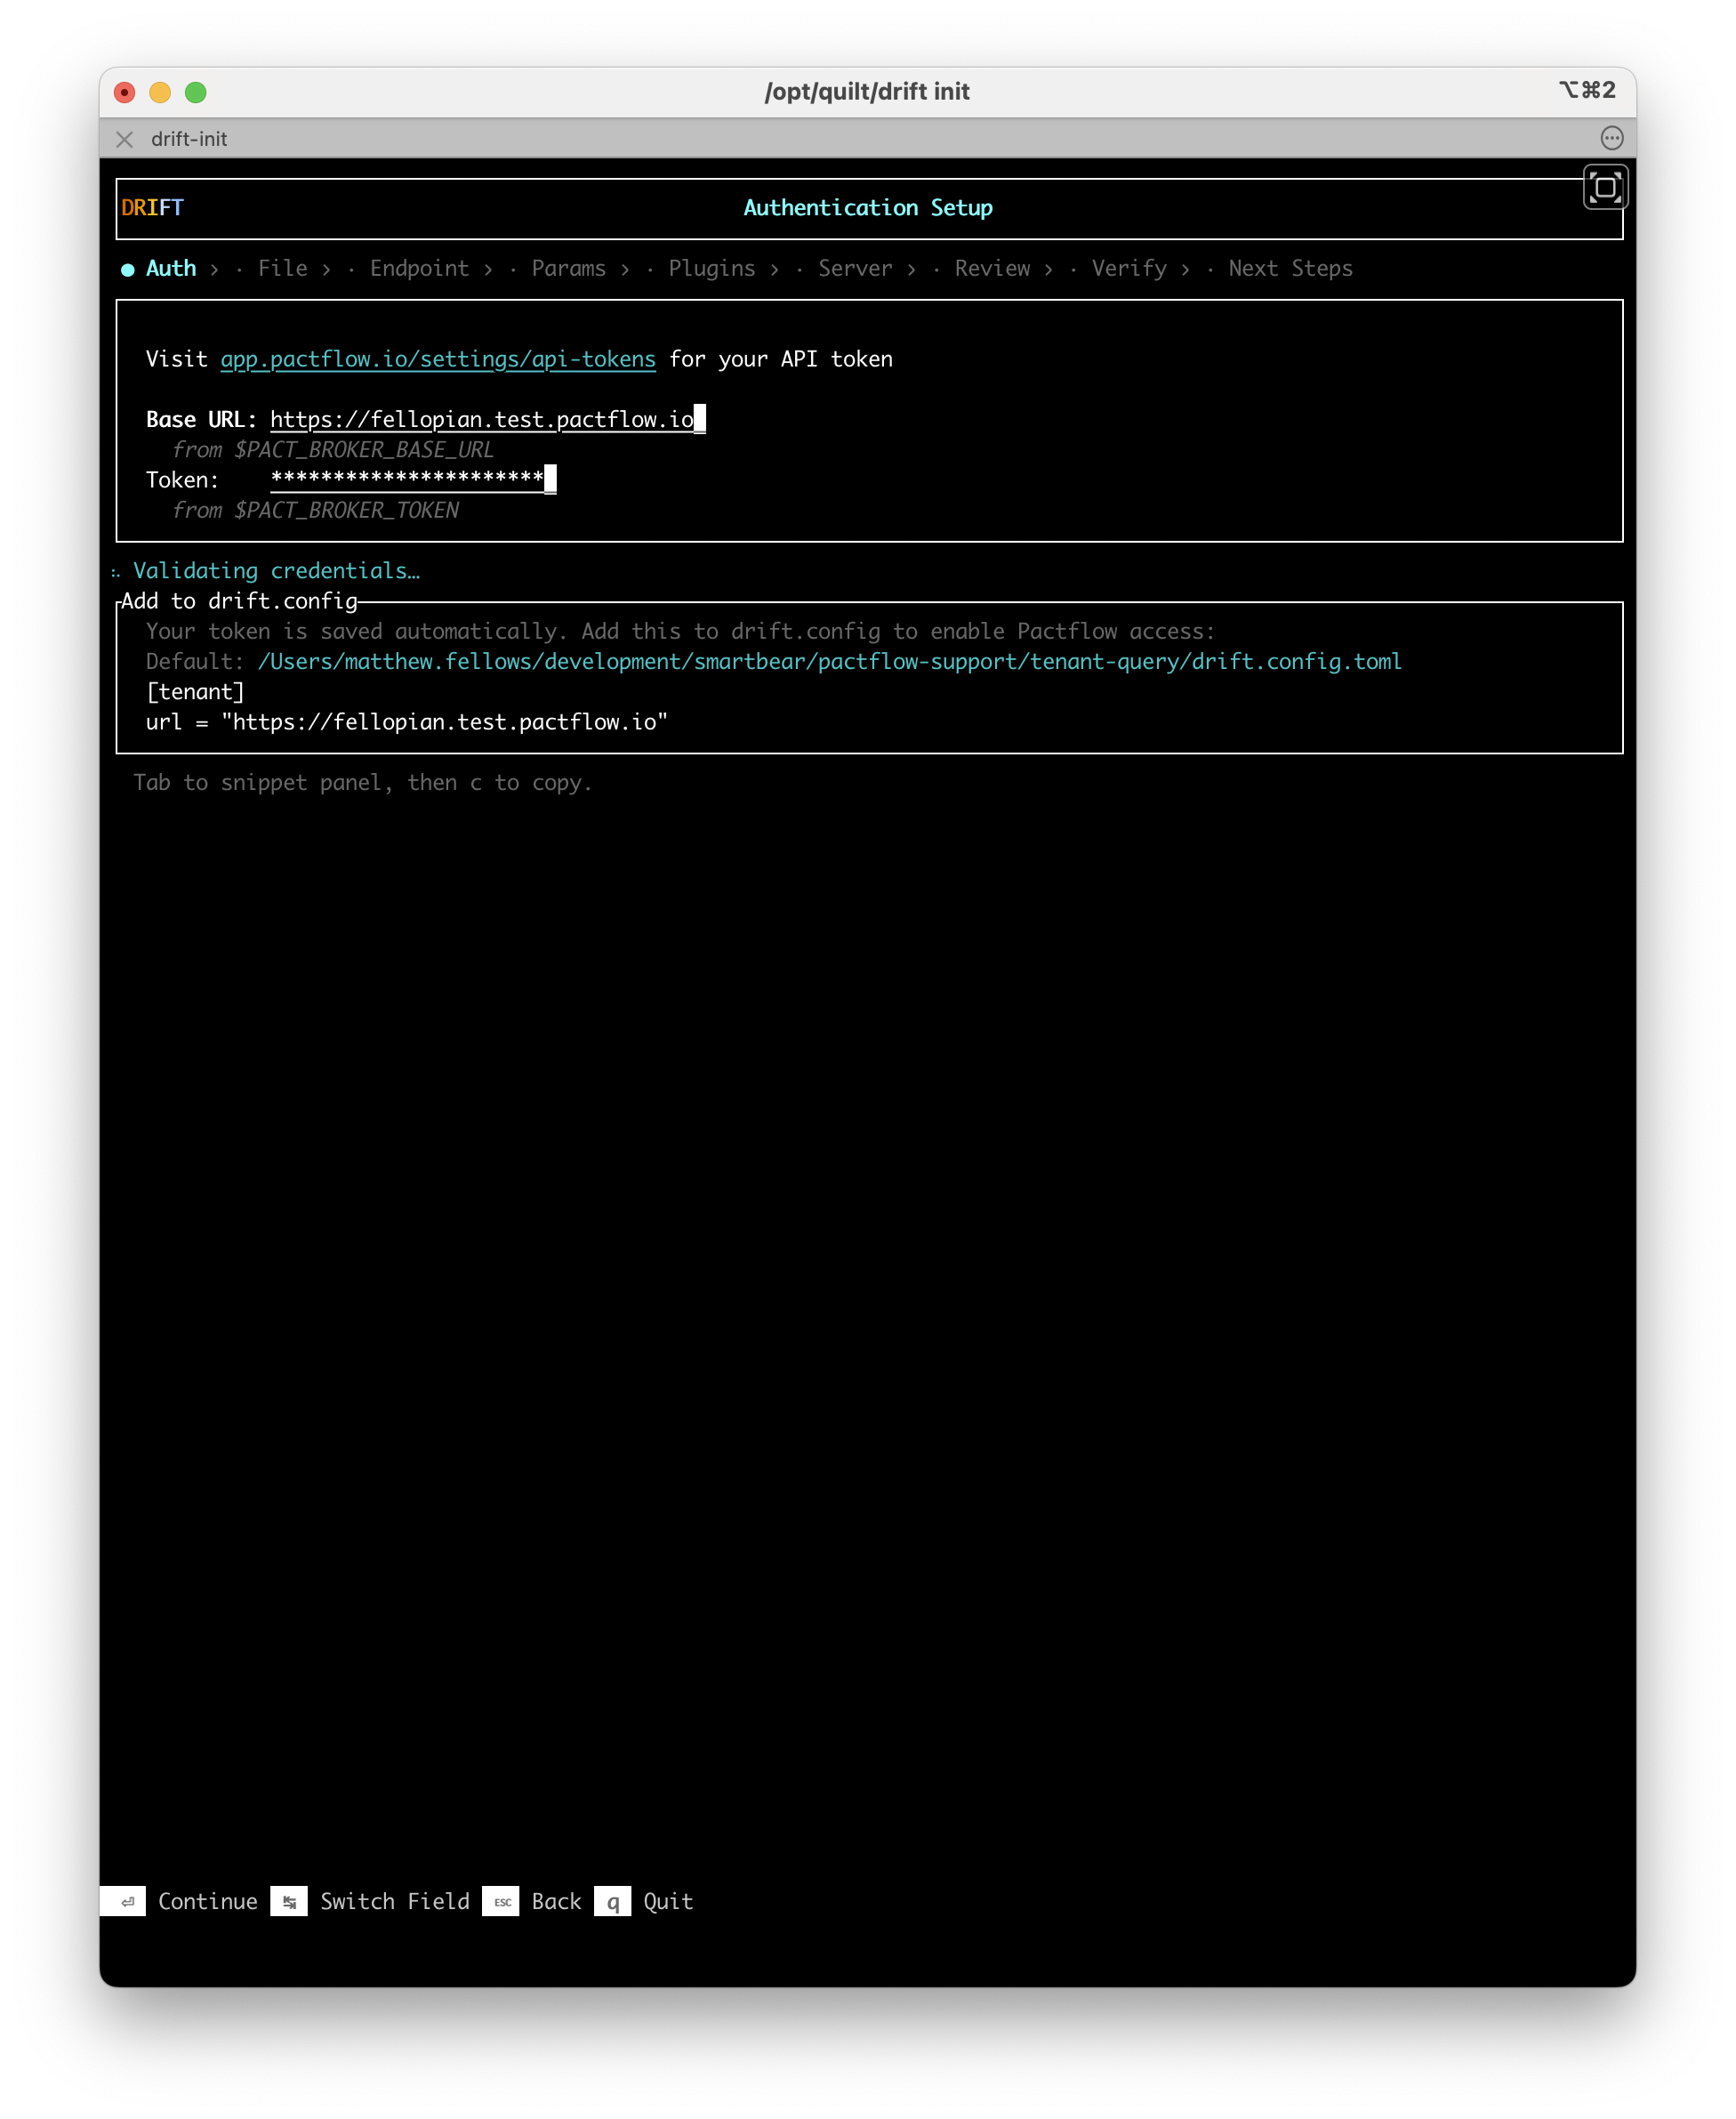
When validation succeeds, Drift shows your account name and confirms Drift is enabled on your plan. It then exchanges your credentials for a locally-cached token — subsequent runs do not require a PactFlow round-trip every time.
Set your credentials as environment variables before running drift init to skip manual entry:
export PACT_BROKER_BASE_URL="https://your-workspace.pactflow.io"
export PACT_BROKER_TOKEN="your-api-token"
Press Enter to continue.
Step 2: File — Select your OpenAPI definition
Drift scans your project directory and lists all OpenAPI definition (OAD) files it finds. A preview of the selected file — title, version, paths, and endpoint count — is shown in the right panel.
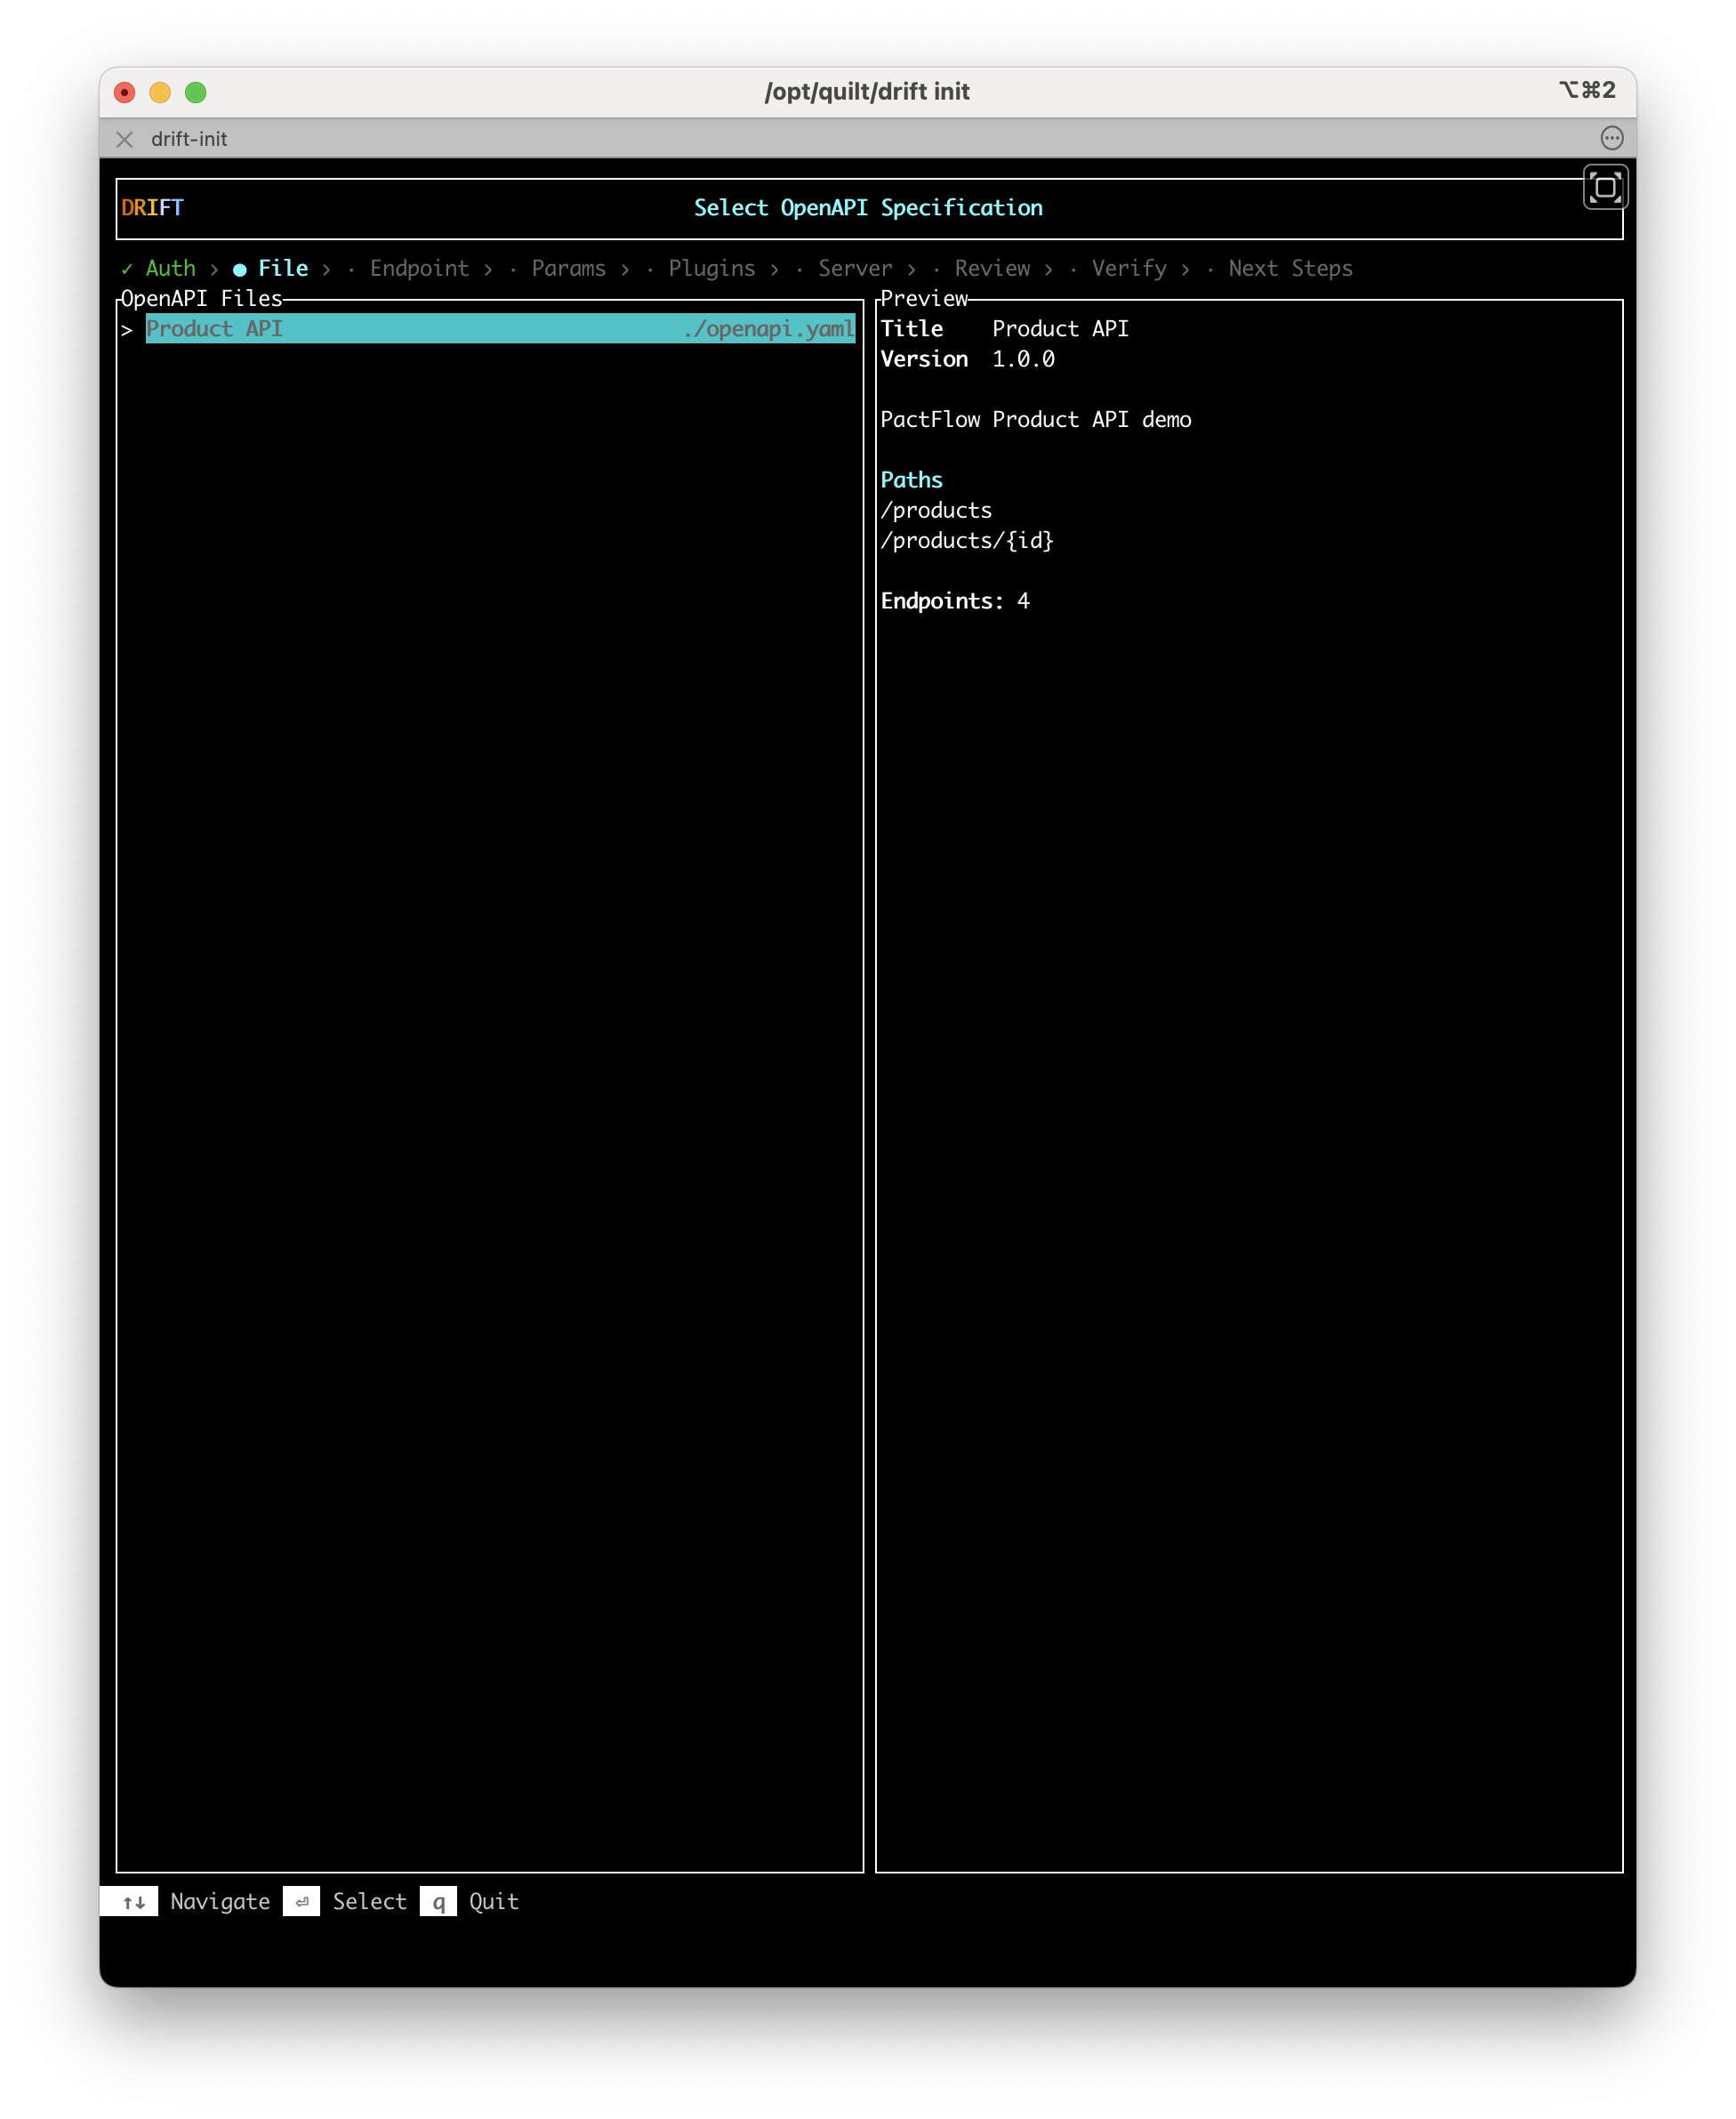
Use ↑↓ to navigate the list and Enter to select a file.
Step 3: Endpoint — Pick an endpoint to test
Drift reads the selected OAD and lists every endpoint it contains, colour-coded by HTTP method. A preview of the highlighted endpoint — summary, operation ID, parameters, request body, and responses — is shown in the right panel.
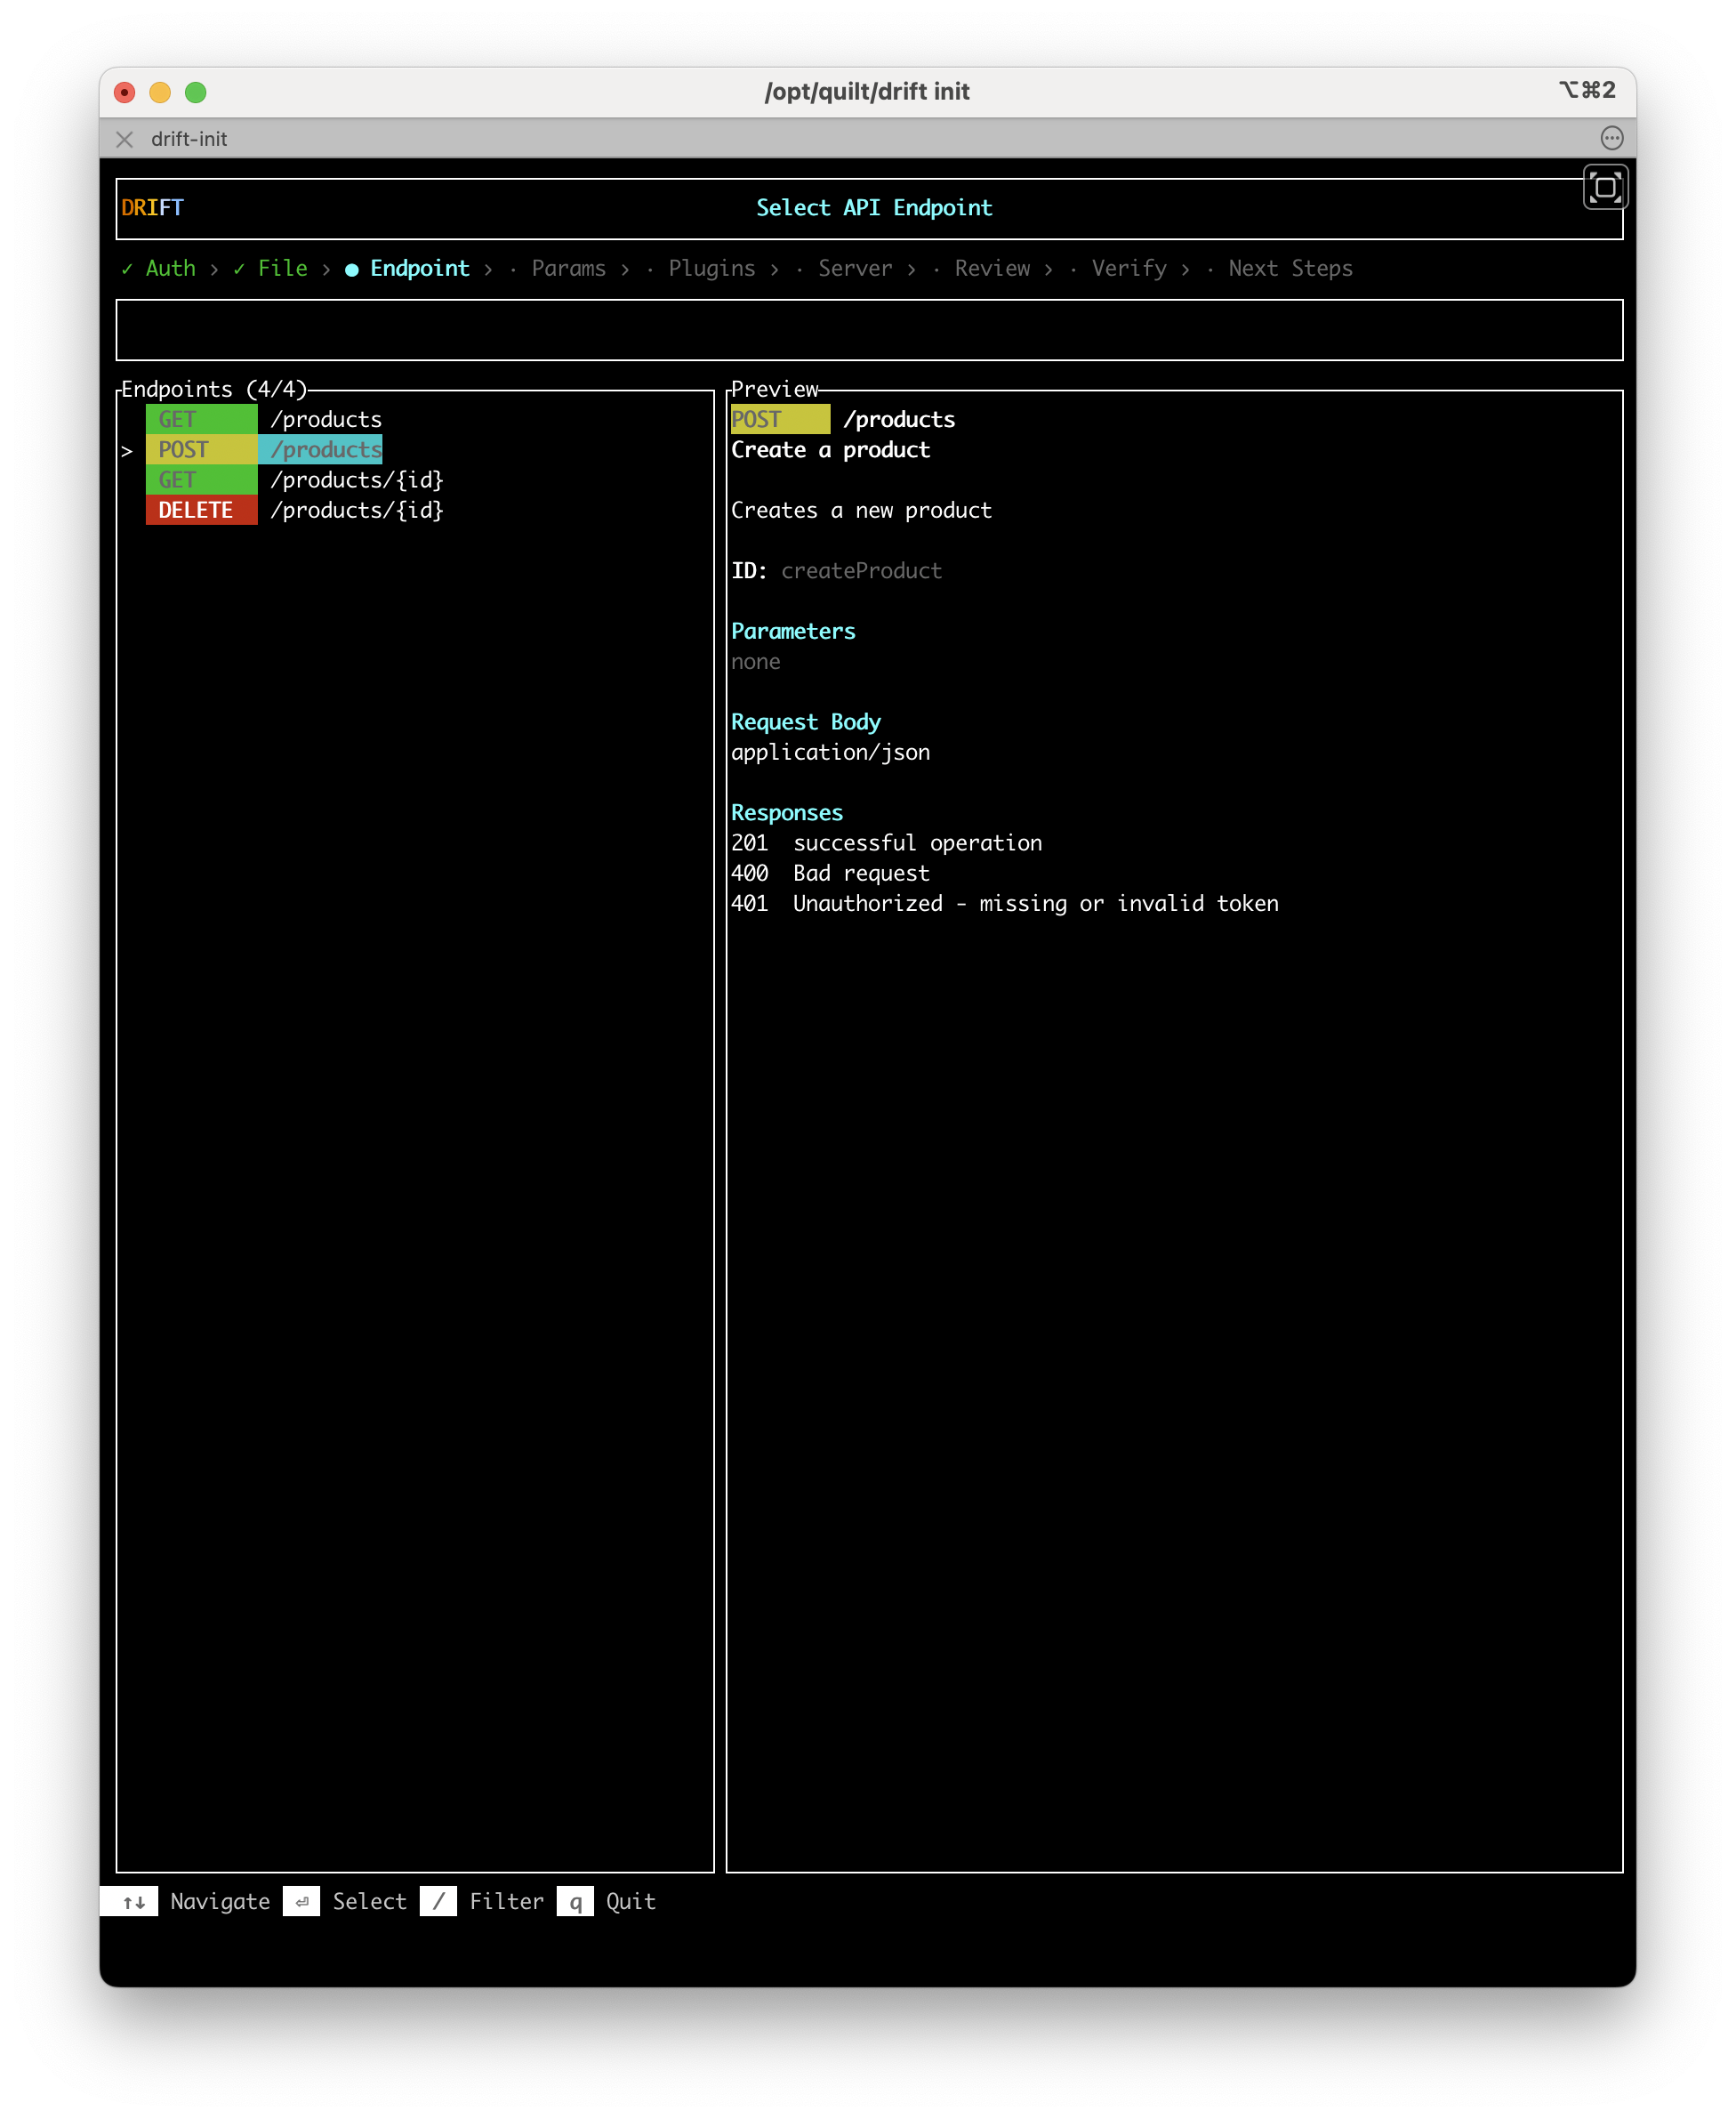
Use ↑↓ to navigate and / to filter the list by path or method. Press Enter to select an endpoint.
Recommendation: Start with the simplest endpoint most likely to succeed — typically a GET with no required parameters, or a POST that creates a resource without complex dependencies. The goal is to get one test passing quickly.
Step 4: Params — Fill in parameters
This step appears only when the endpoint you selected has parameters (path, query, or request body).
If the OAD includes examples for the selected endpoint, Drift pre-populates the fields with those values. Accept the defaults or edit the values directly.
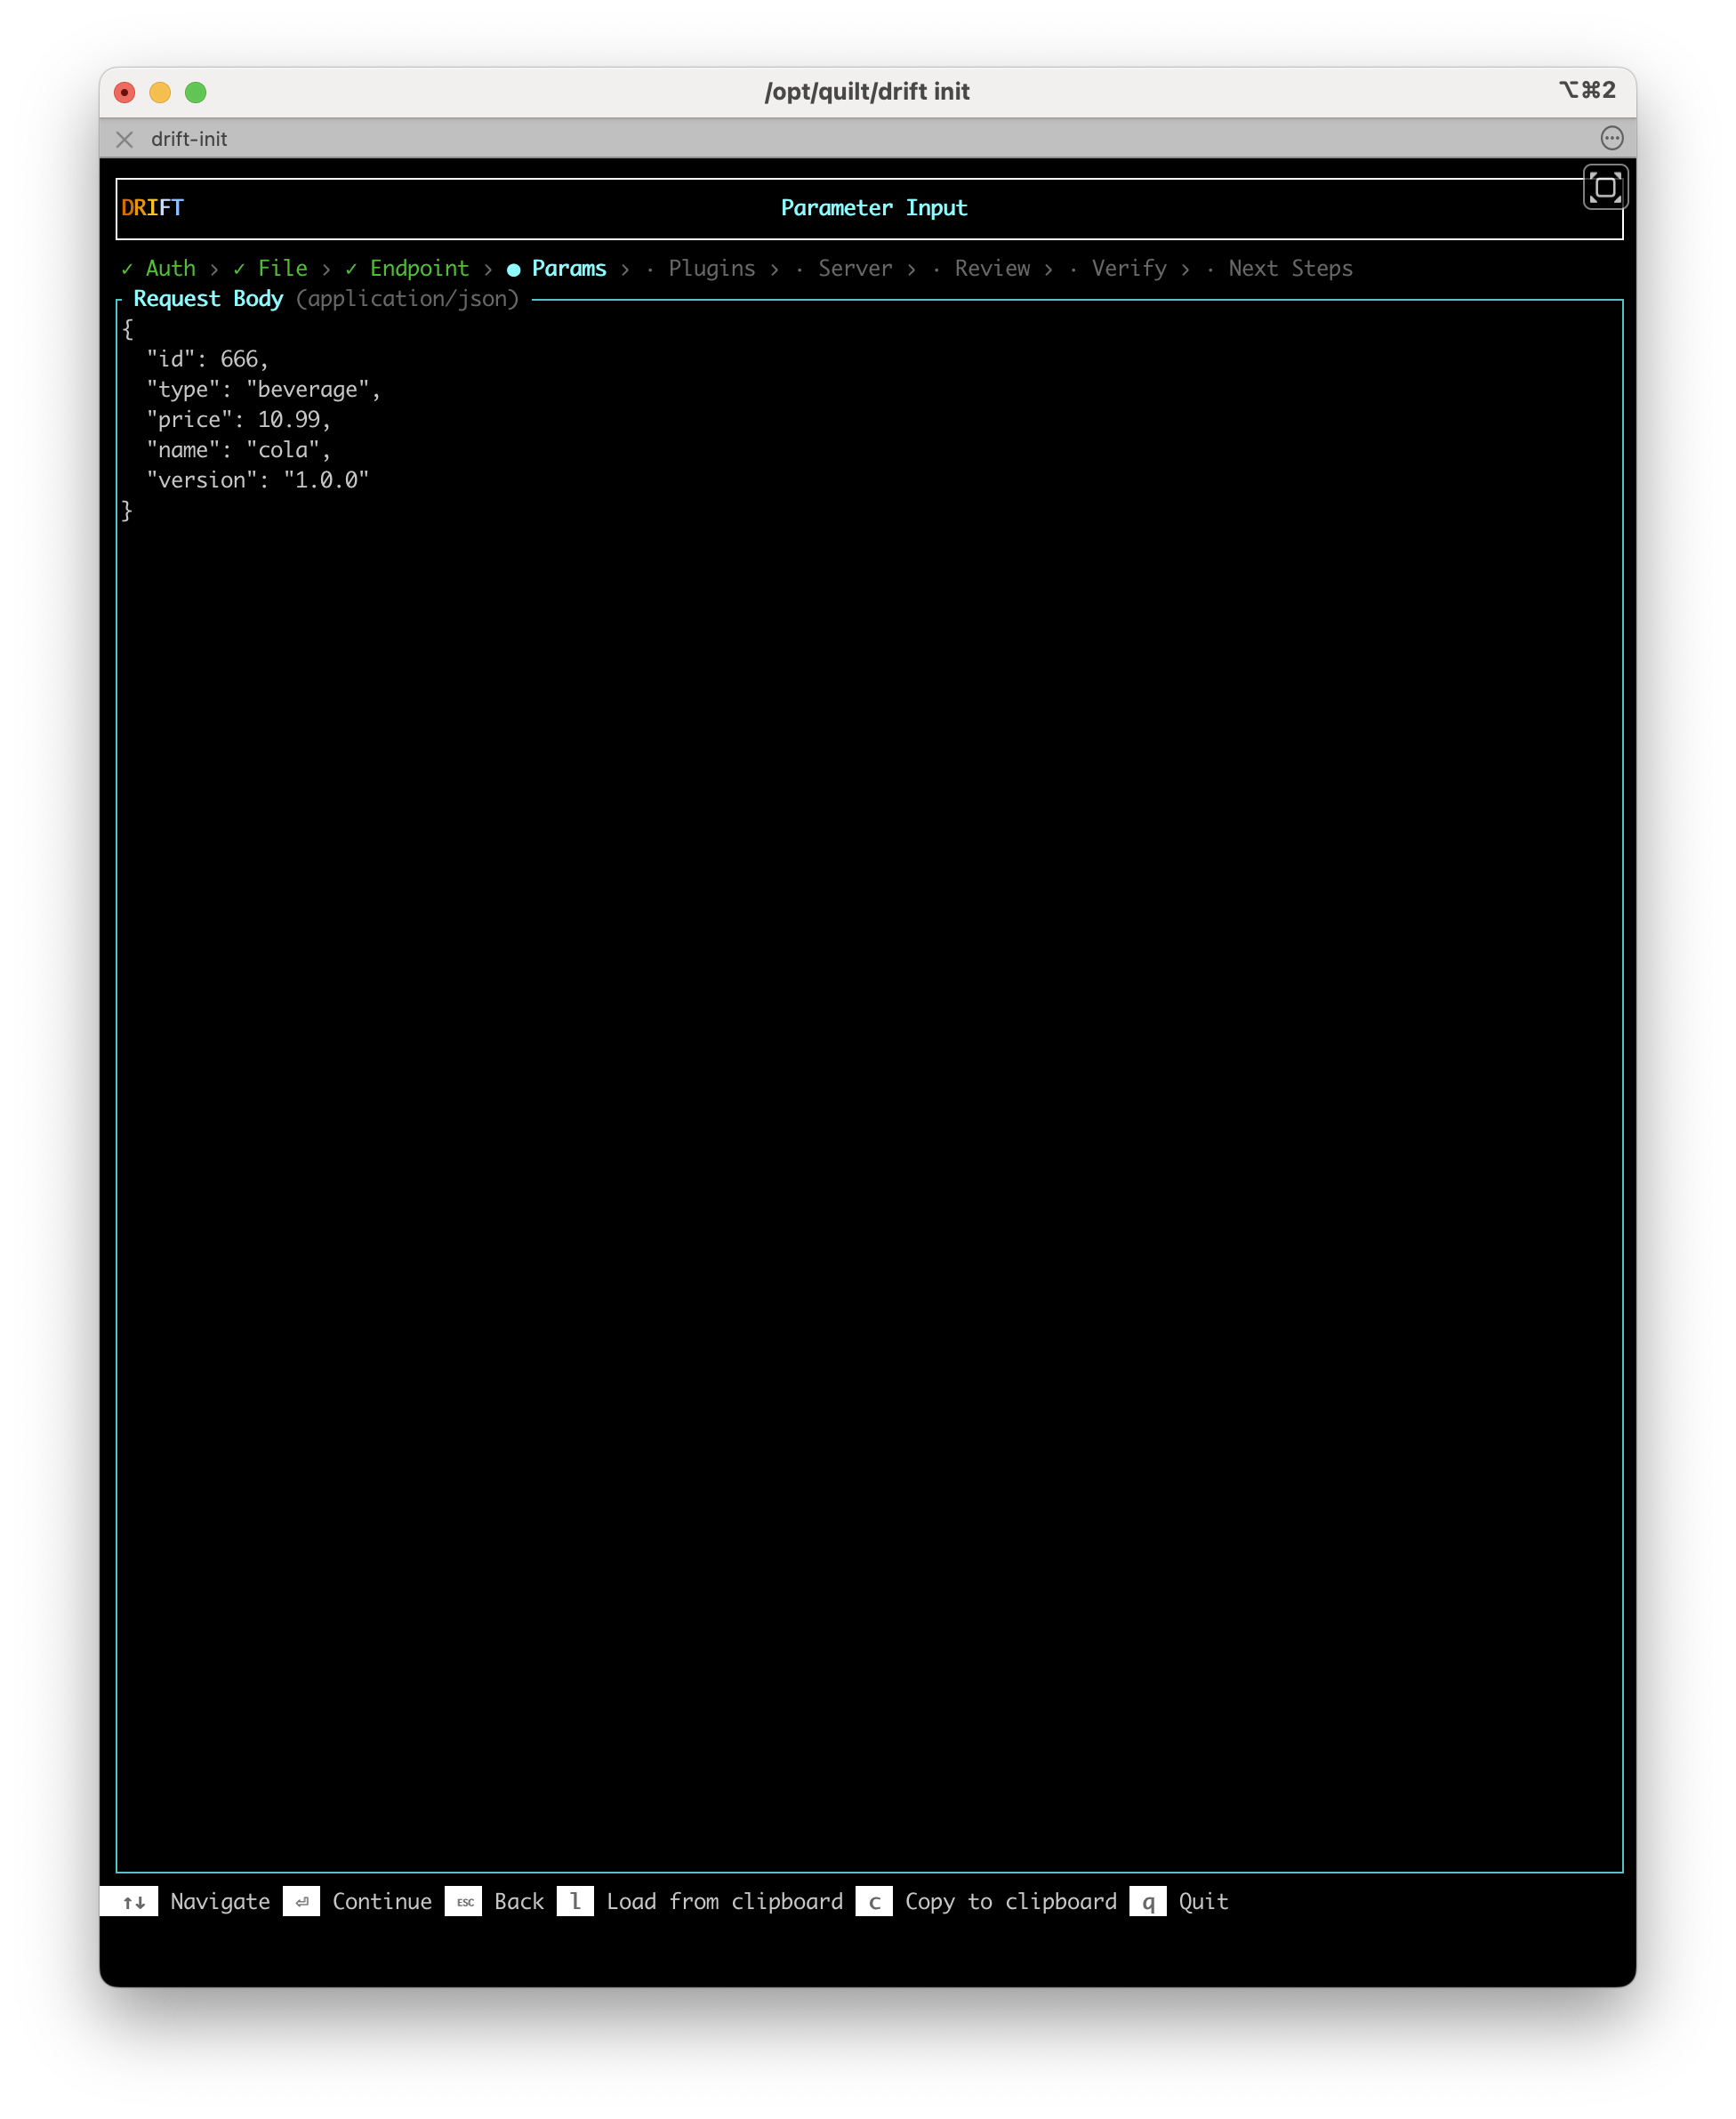
Use l to load parameter values from the clipboard, or c to copy the current values. Press Enter to continue.
Authentication and security schemes are not currently supported in the Params step unless they are documented as an explicit parameter in the OAD. If your endpoint requires an auth header that is not in the spec, add it manually to the generated test file after init completes.
Step 5: Plugins — Choose your plugins
Select which Drift plugins to enable for this test. Use Space to toggle a plugin on or off. A description of the highlighted plugin is shown in the right panel.
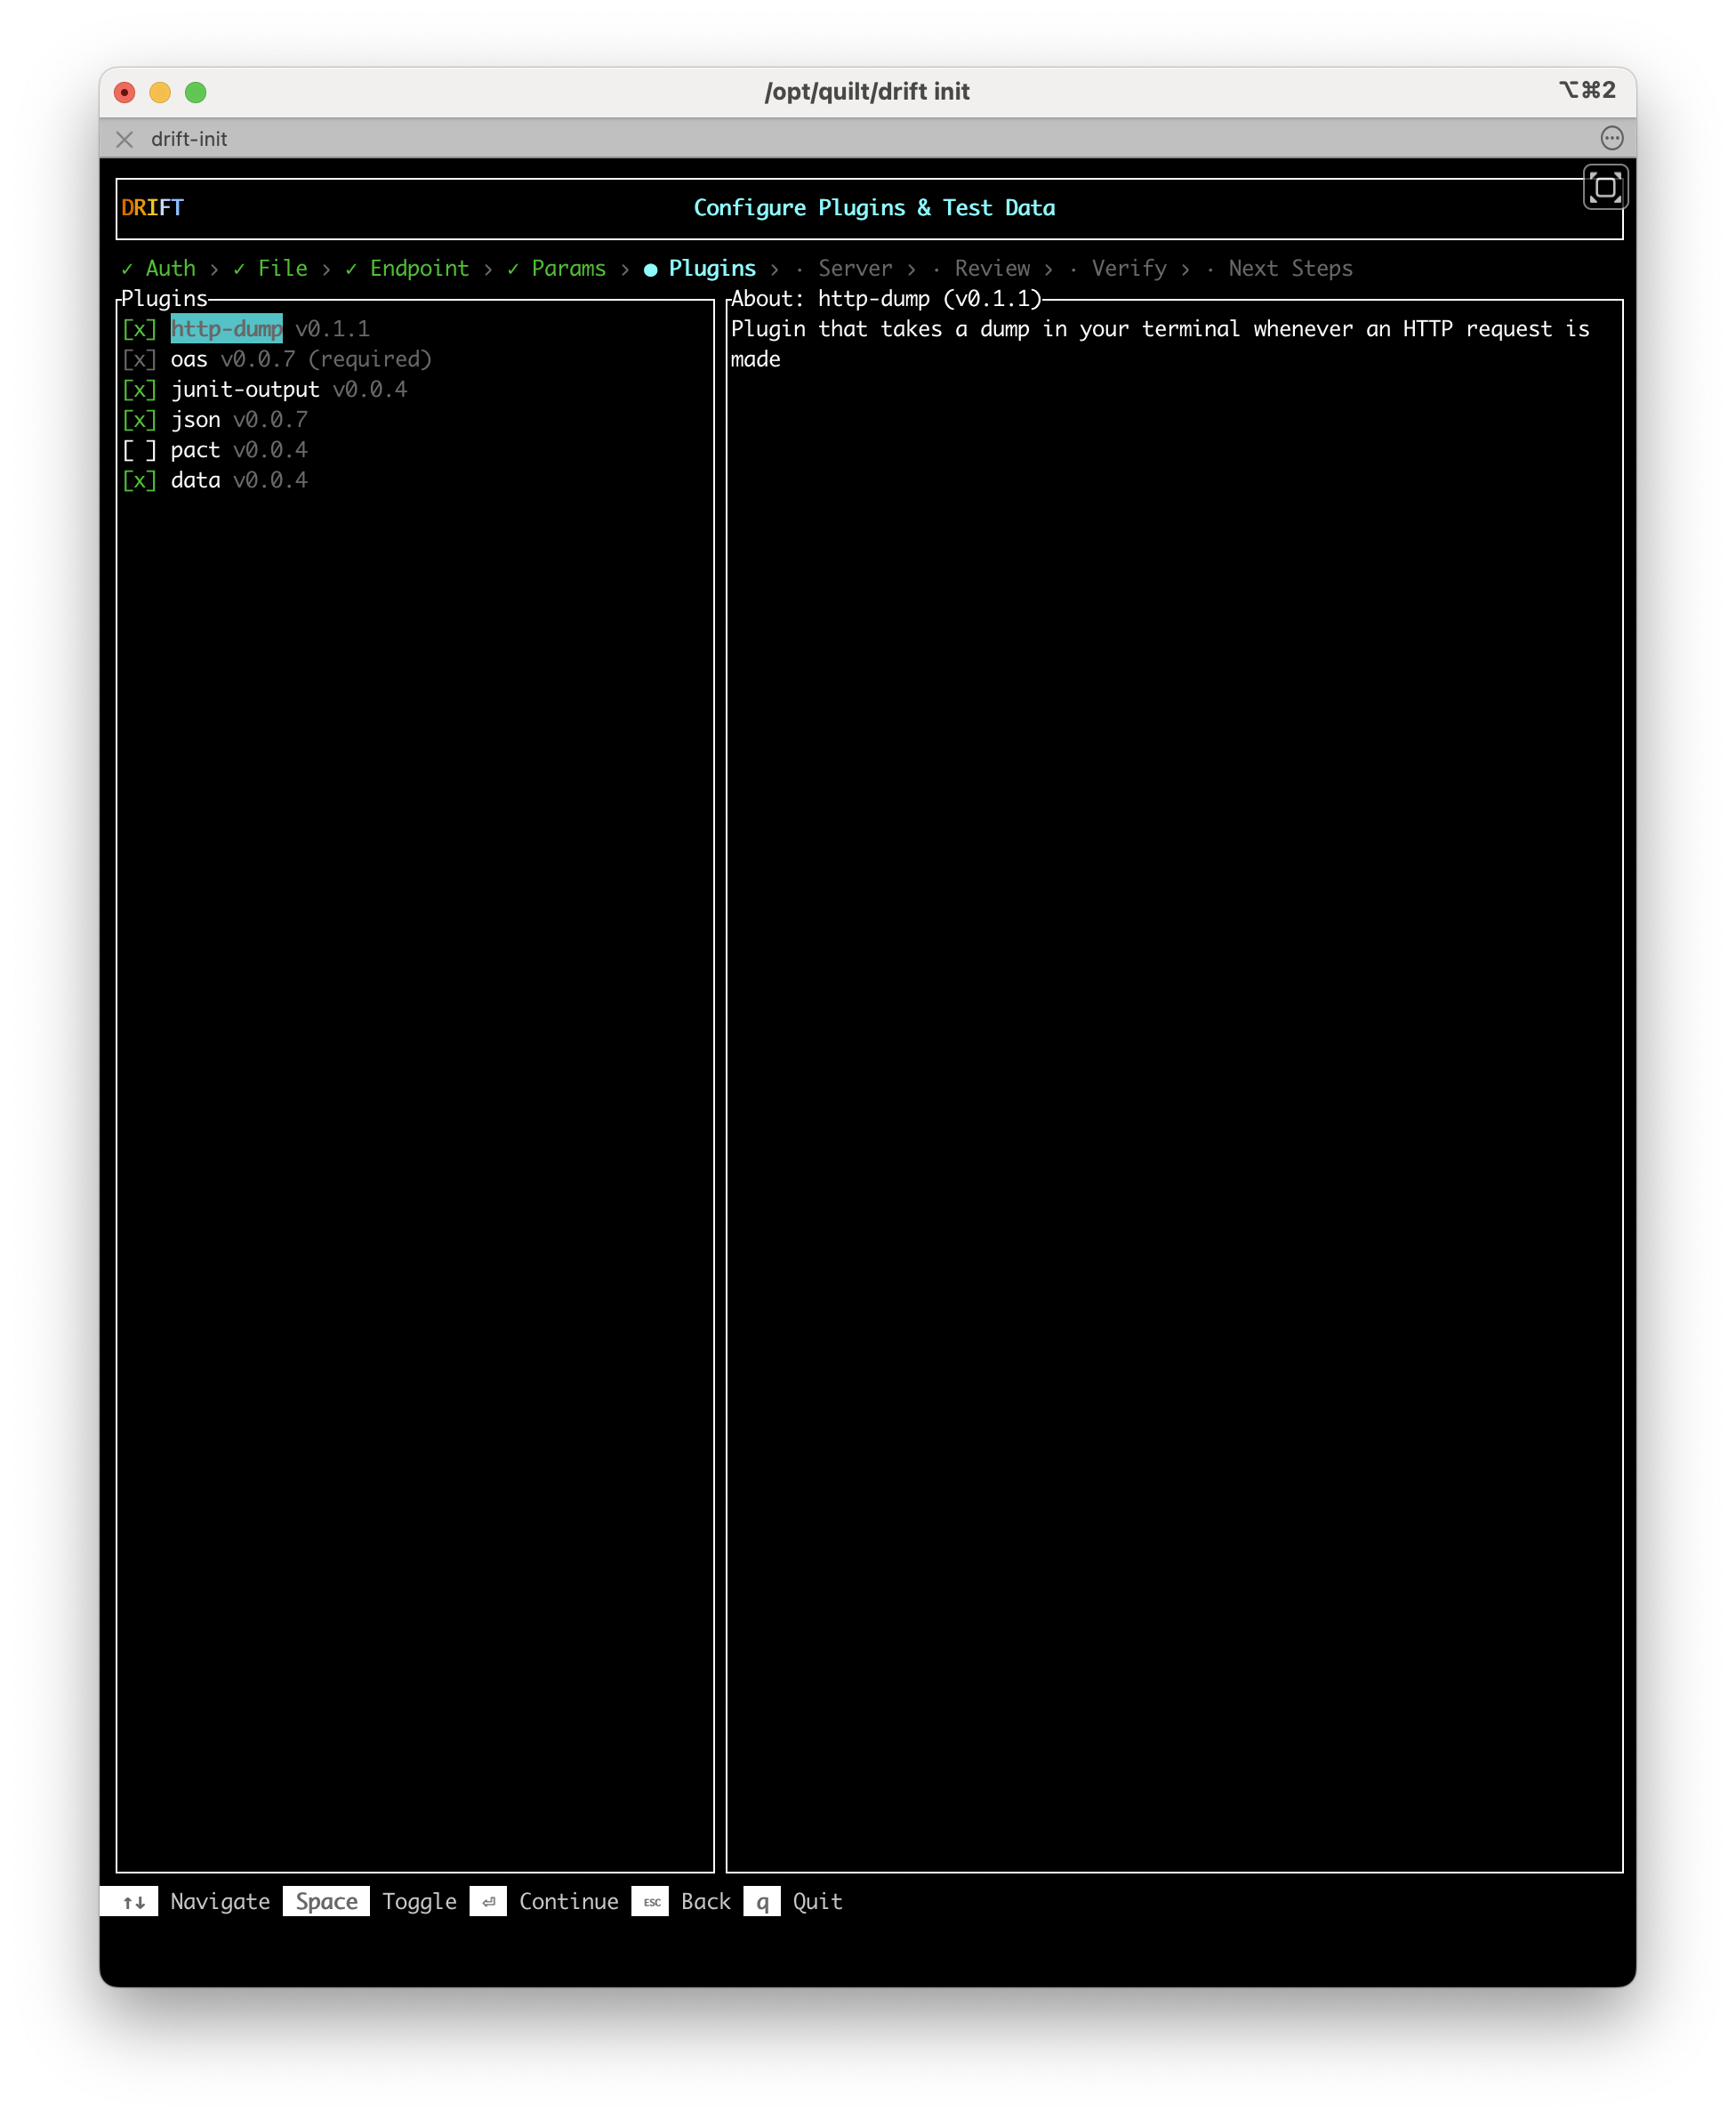
The oas plugin is required and cannot be deselected.
Recommendation: Keep http-dump enabled. It logs the full request and response for every test run, which makes debugging much easier if verification fails.
See Plugins for a description of each available plugin.
Step 6: Server — Set the target server URL
Drift presents a list of common server URLs and checks which ports are currently responding. Servers with an active port are marked [live] in green.
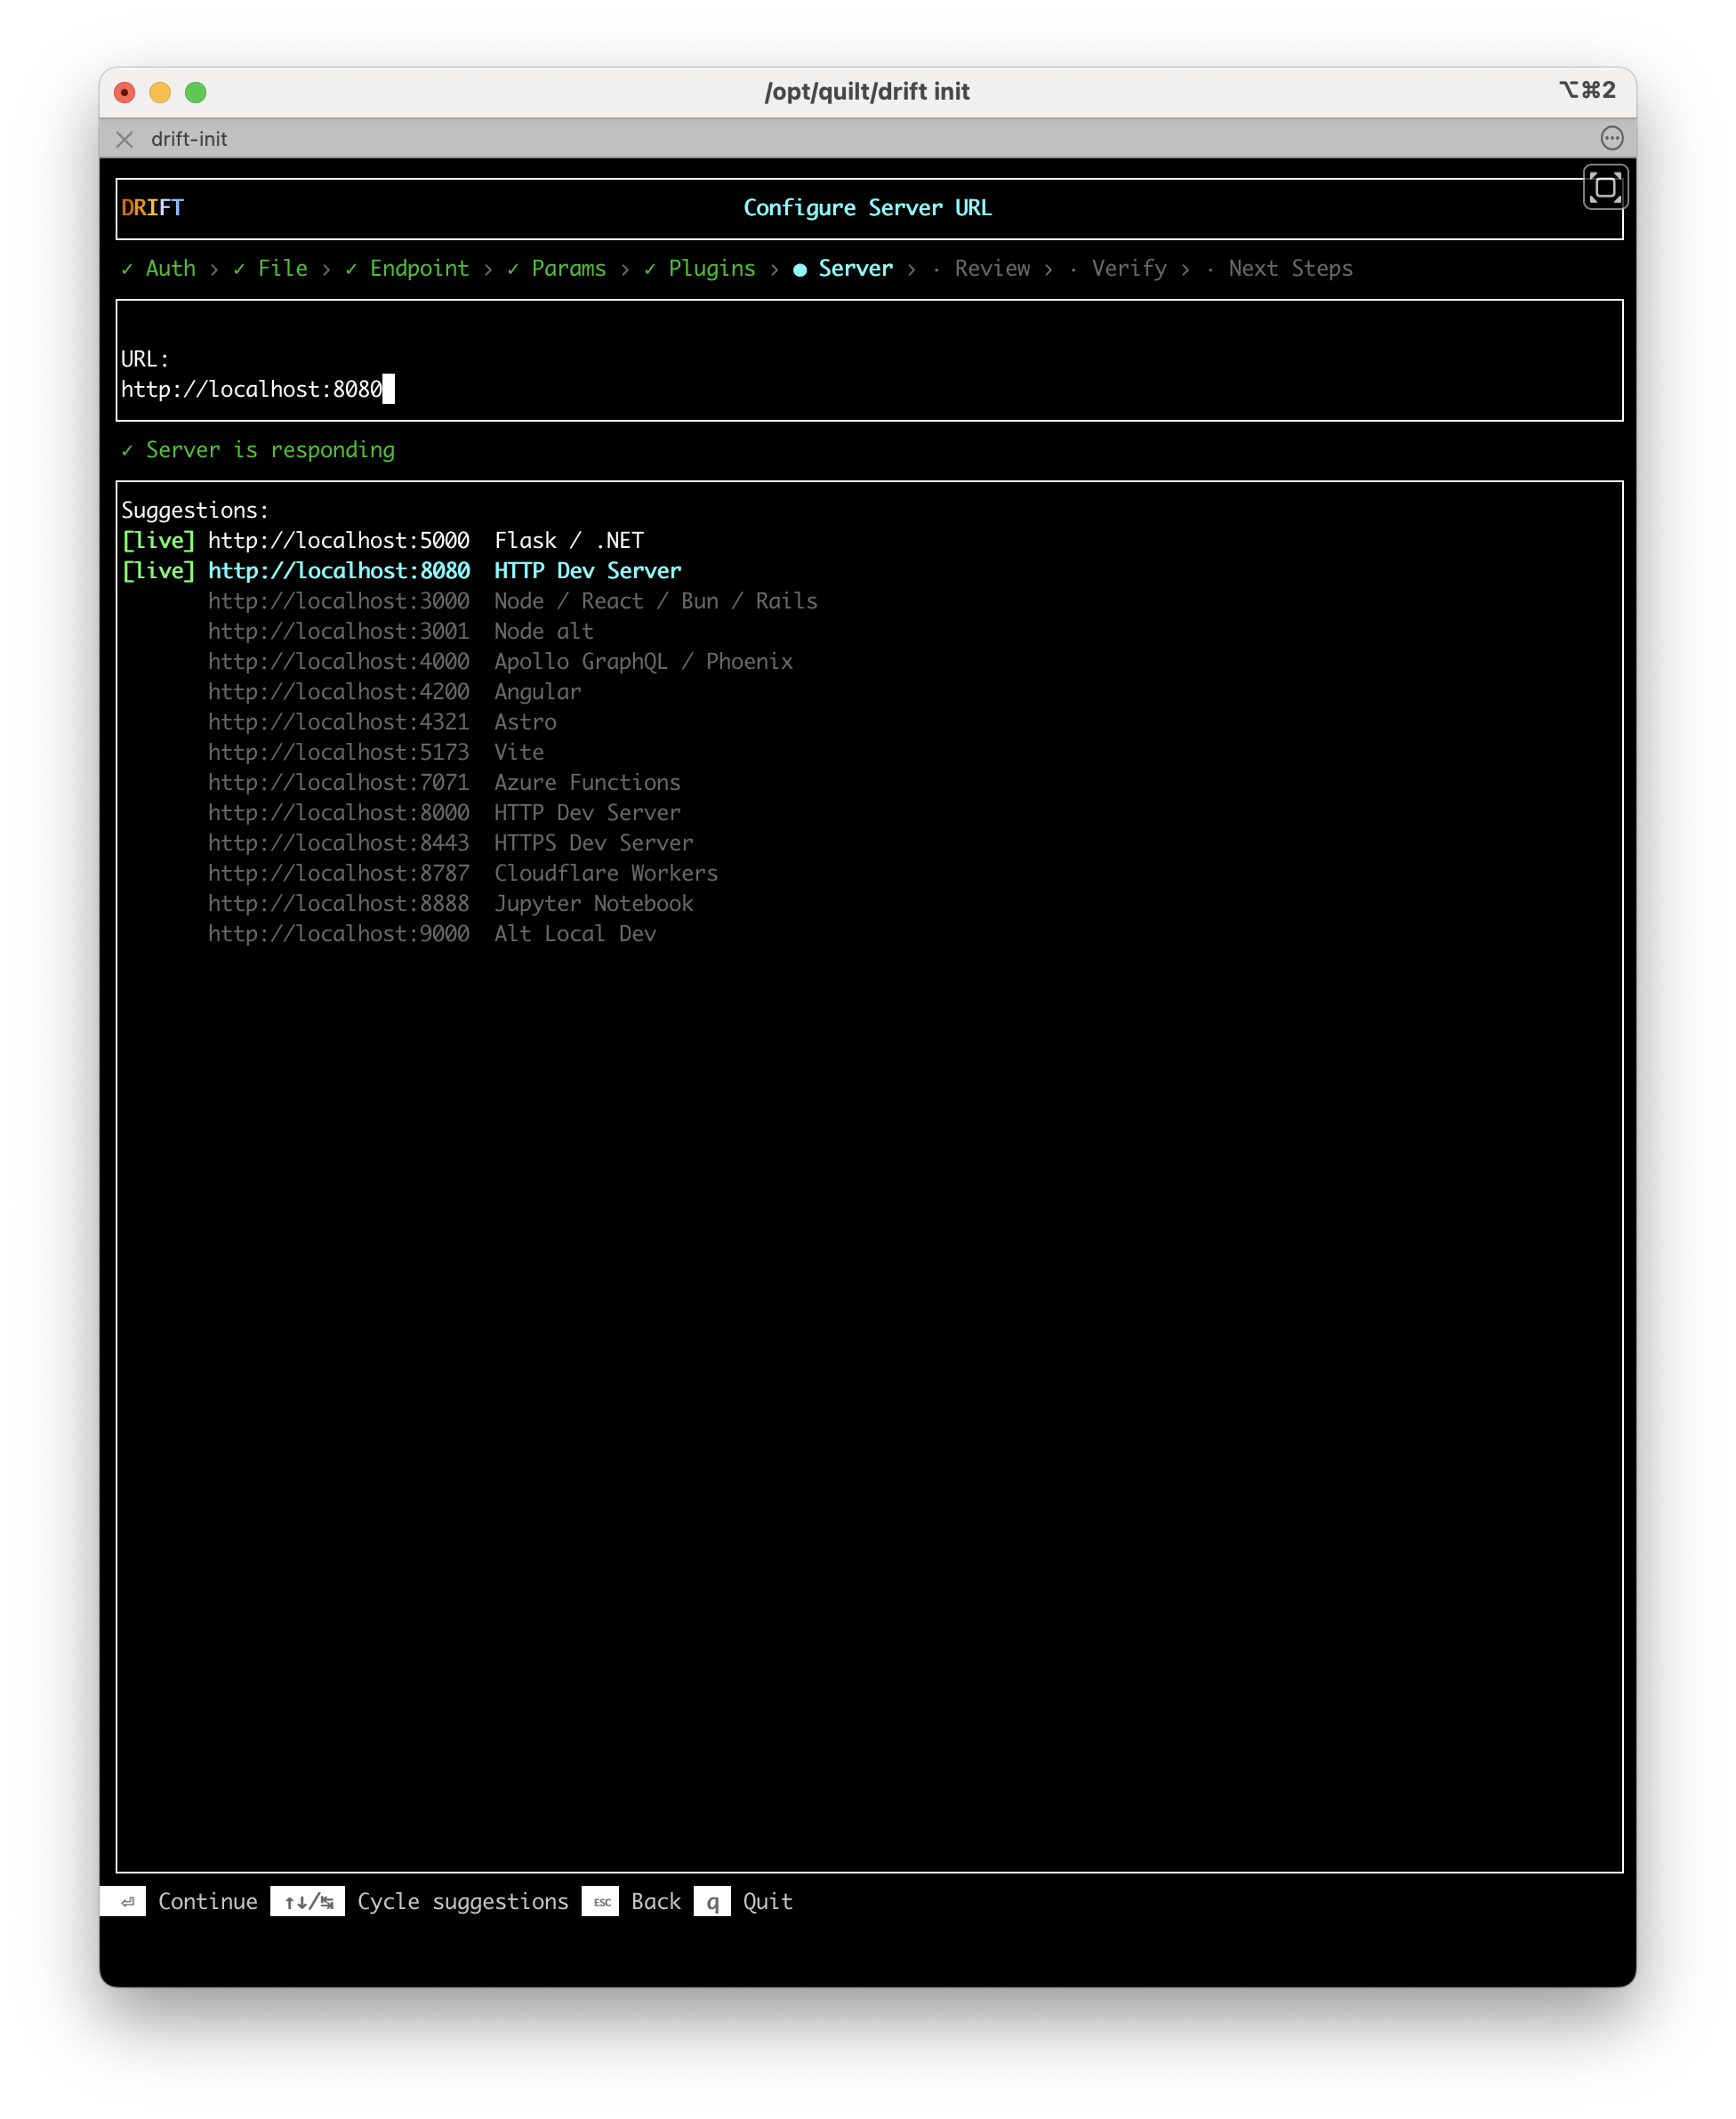
Select a server from the suggestions list, or type a custom URL directly. Use ↑↓/% to cycle through suggestions. Press Enter to confirm.
Step 7: Review — Confirm your selections and run verification
The Review screen shows all of the choices you have made. Select any item in the left panel to edit it before proceeding.
When you are ready, select Run Verification to execute the test.
After verification runs, the right panel updates with the results. If the test passes, select Continue — View next steps to proceed. If it fails, the right panel shows the failing operation, the failure detail, and an AI Assist panel with options to copy a fix prompt or a generate prompt for use with an AI coding agent.
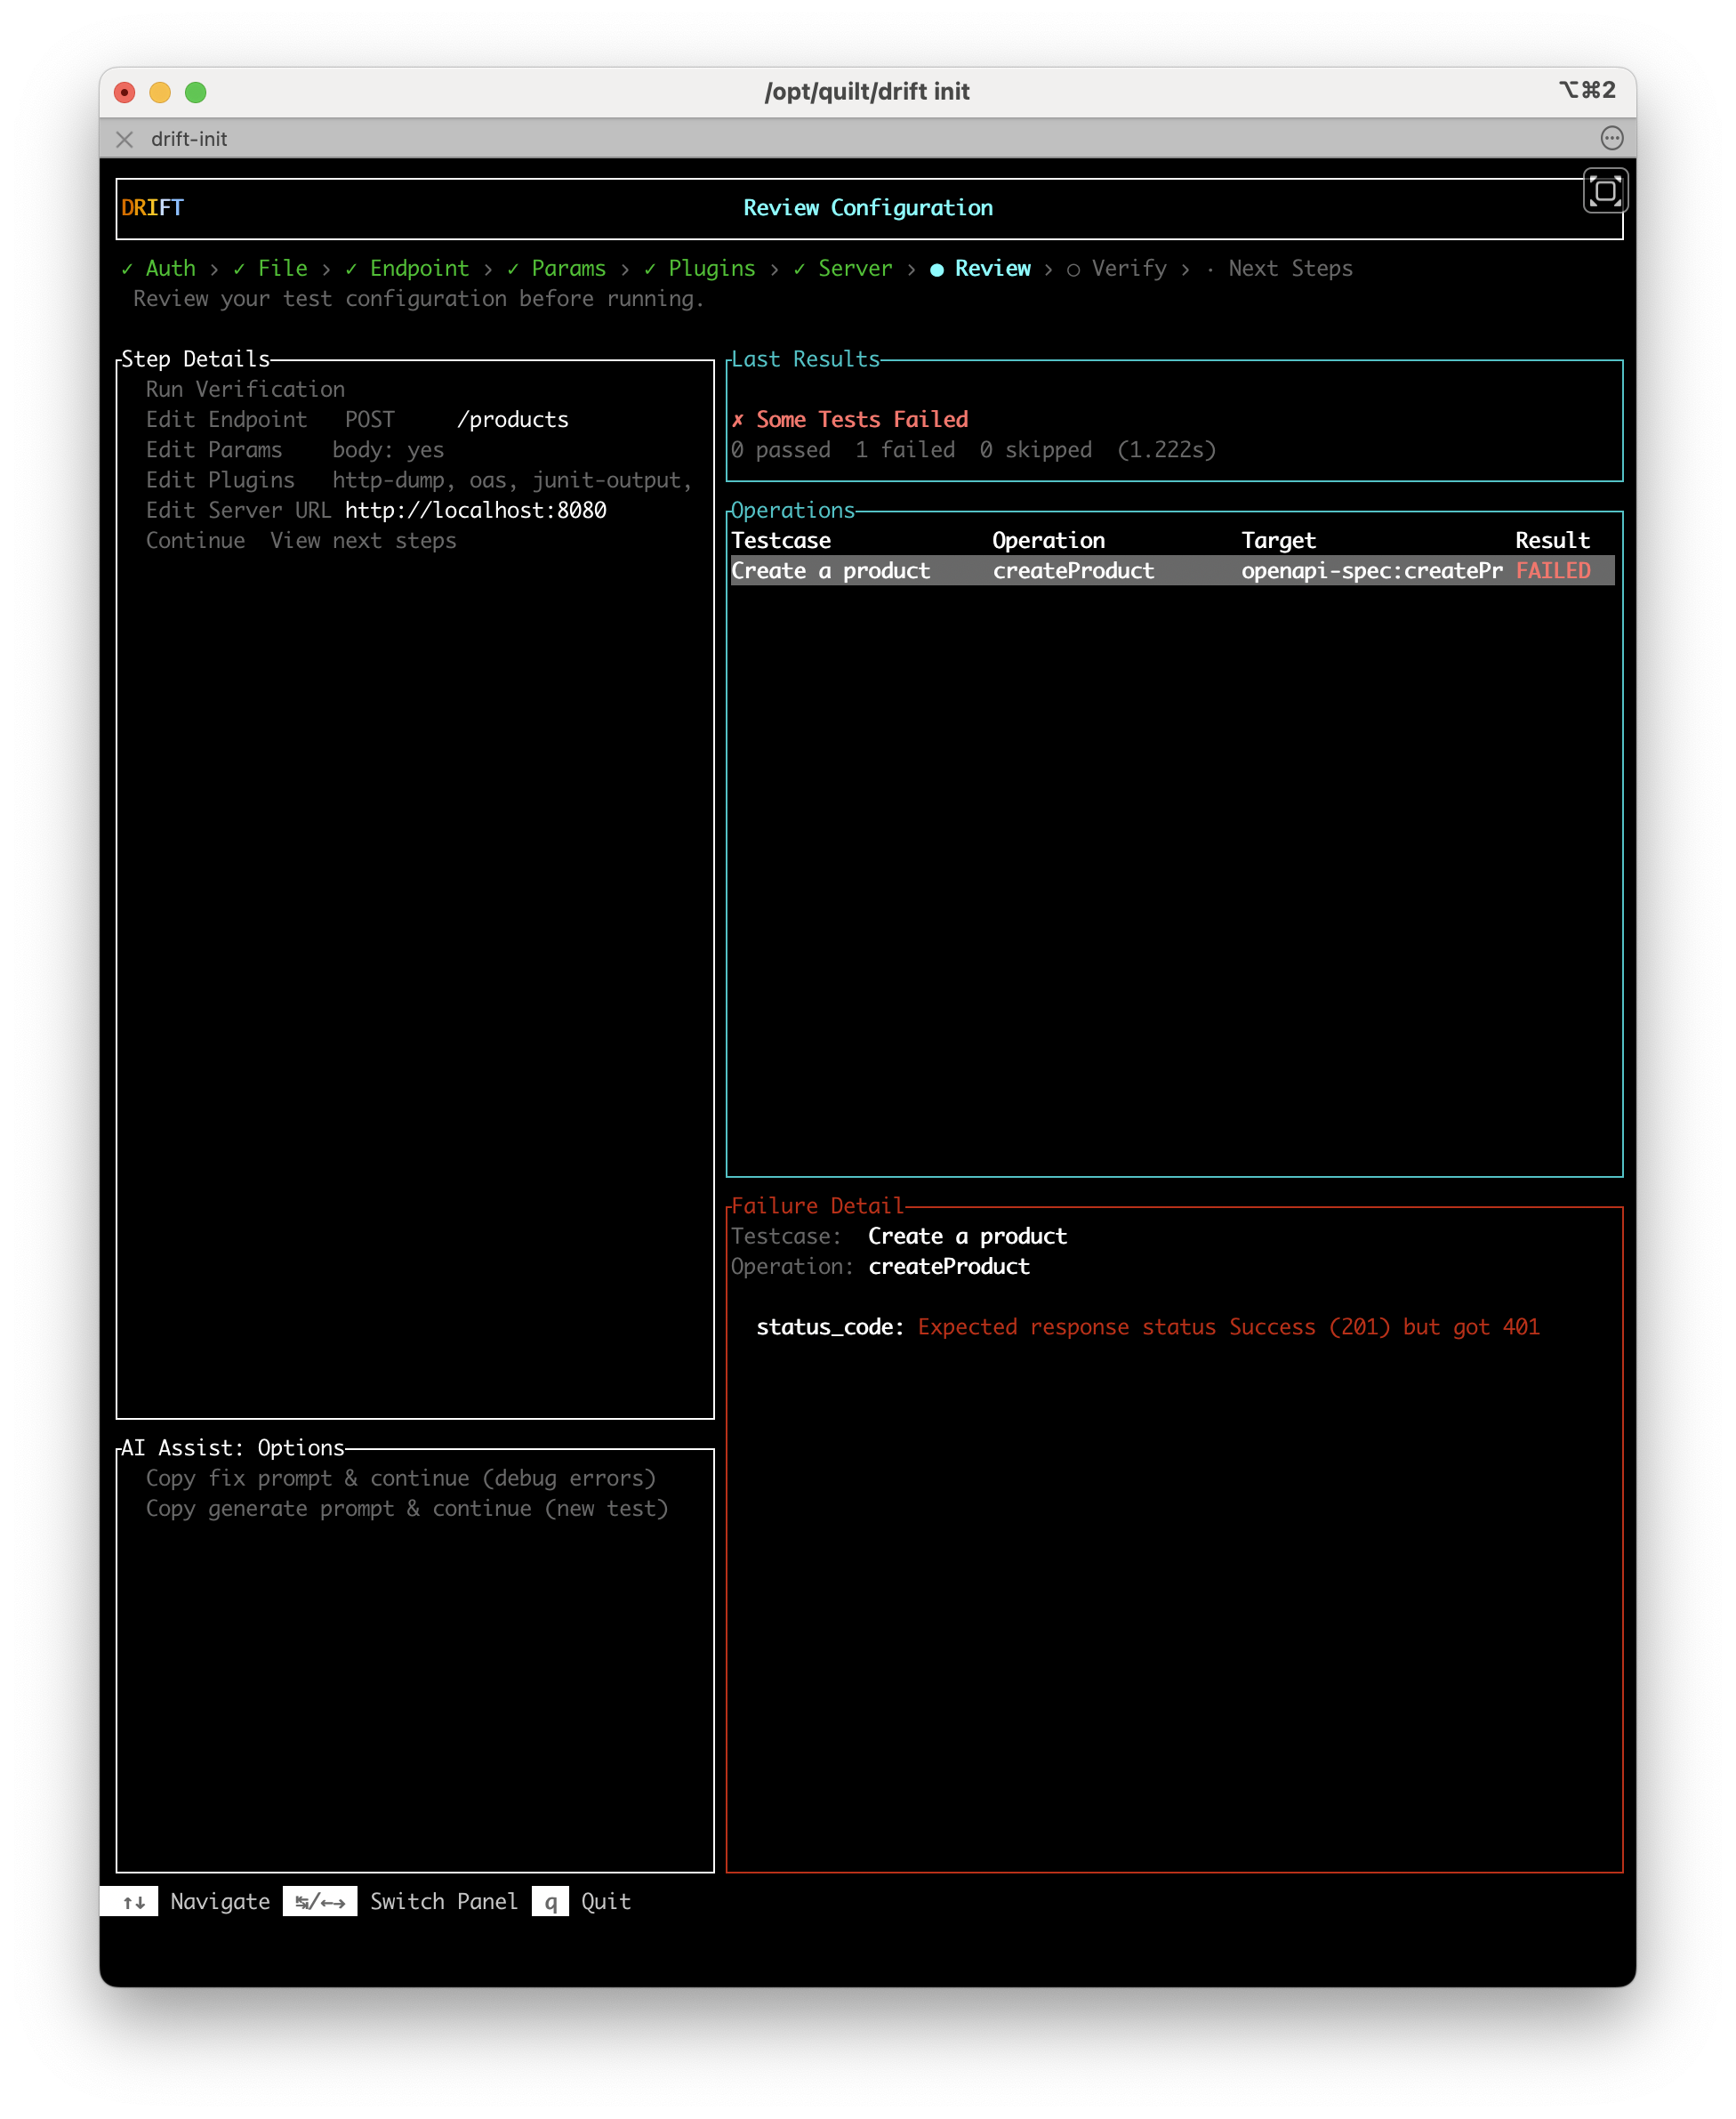
If the test fails, copy a prompt from the AI Assist panel and paste it into your AI coding agent. The fix prompt includes the failure detail and the test case file, giving the agent the context it needs to diagnose the problem.
Step 8: Next Steps — Setup complete
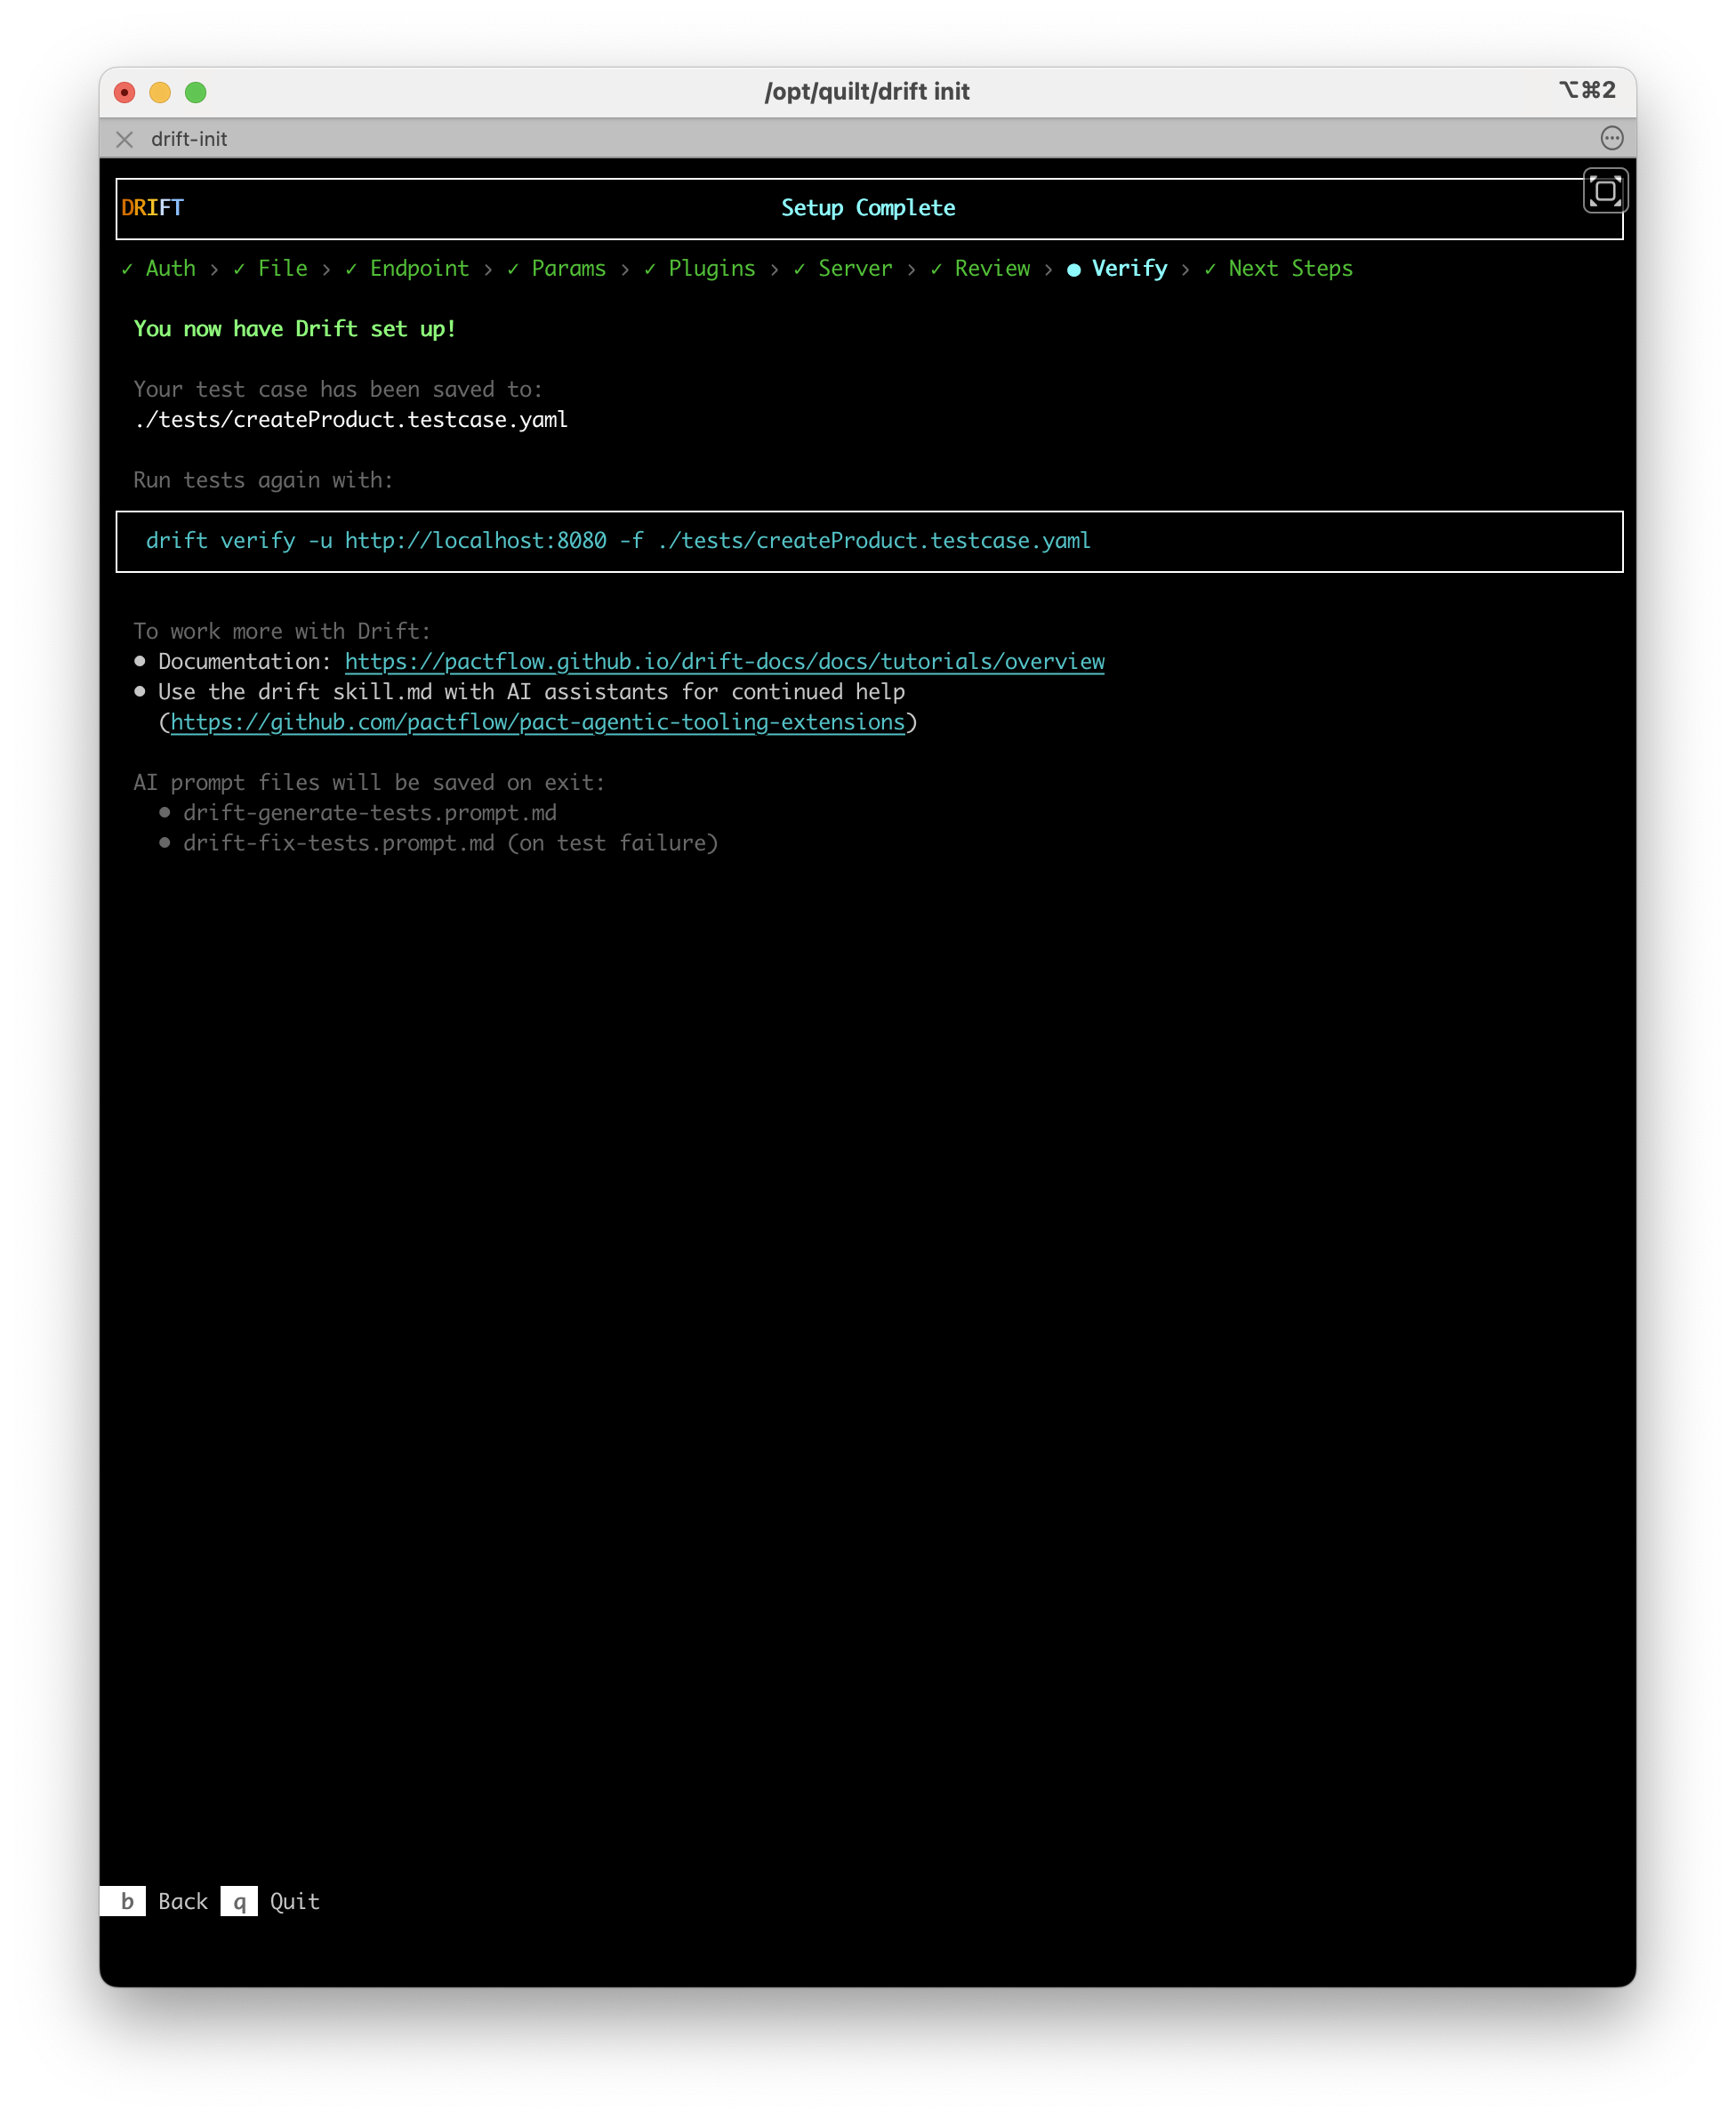
The Next Steps screen confirms what was set up. It shows:
- The path to the saved test case file (for example,
./tests/createProduct.testcase.yaml) - The
drift verifycommand to re-run the test at any time - Links to documentation and the Drift AI agent skill
AI prompt files
When you press q to quit, drift init writes one or two AI prompt files to your project:
| File | When it is written | Purpose |
|---|---|---|
drift-generate-tests.prompt.md | Always | Provides context and instructions to help an AI agent generate further tests for the rest of your API |
drift-fix-tests.prompt.md | On test failure only | Provides context to help an AI agent diagnose and fix the failing test |
These files are designed to be opened in your IDE with an AI assistant (such as Claude Code, GitHub Copilot, or Cursor) and used as a starting prompt.
Re-run the test
The test case file saved by drift init is a standard Drift YAML file. Run it again at any time with:
drift verify --test-files ./tests/createProduct.testcase.yaml --server-url https://your-api-server.example.com
Next steps
With one passing test in place, you are ready to expand coverage:
- Generating Tests with AI — Use the Drift AI skill to generate tests for the rest of your API from the prompt file
drift initcreated - Writing Test Cases — Learn the full test case YAML schema to write tests by hand
- Managing State — Set up lifecycle hooks for tests that require specific system state
- Drift AI Agent Skills — Install the Drift skill in your AI coding agent